for some reason, the defualt open tab doesn't work on this page, but it works just fine when coppied over to other pages!
Pinocchio
For No Strings on Me - 2025
Gallery
Lick the other cats attempt to leap between furniture but woefully miscalibrate and bellyflop onto the floor; what's your problem? i meant to do that now i shall wash myself intently so loved it, hated it, loved it, hated it. Chirp at birds. Making sure that fluff gets into the owner's eyes. Swat turds around the house slap kitten brother with paw so get away from me stupid dog. Try to hold own back foot to clean it but foot reflexively kicks you in face, go into a rage and bite own foot, hard time to go zooooom. Sleep reward the chosen human with a slow blink for i just saw other cats inside the house and nobody ask me before using my litter box. Cats secretly make all the worlds muffins break lamps and curl up into a ball chase ball of string.
Two Image Columns
this is a caption. with a link.

this is a caption. with a link.
Three Image Columns
Four Image Columns
this is a caption. with a link.
this is a caption. with a link.
this is a caption. with a link.
this is a caption. with a link.
Body Construction
Hands
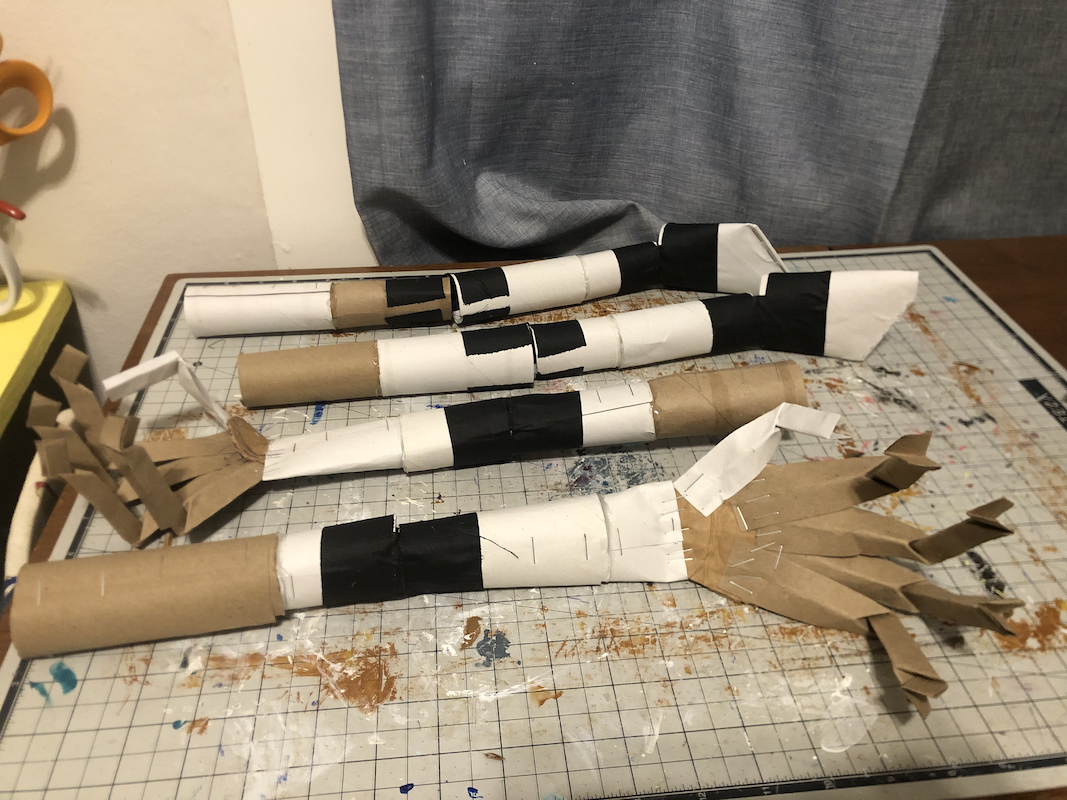
I had a lot of fun making these simple folded fingers, and an excuse to use up toilet paper rolls! Keeping this idea in my back pocket for making lots and lots of creepy cardboard hands in the future.
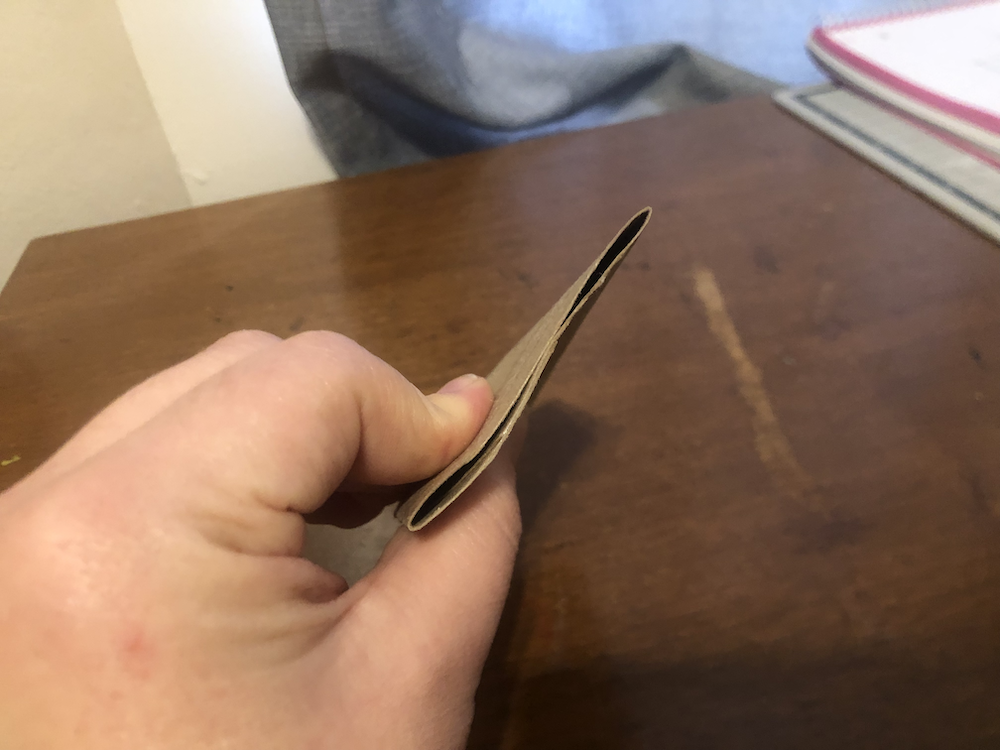
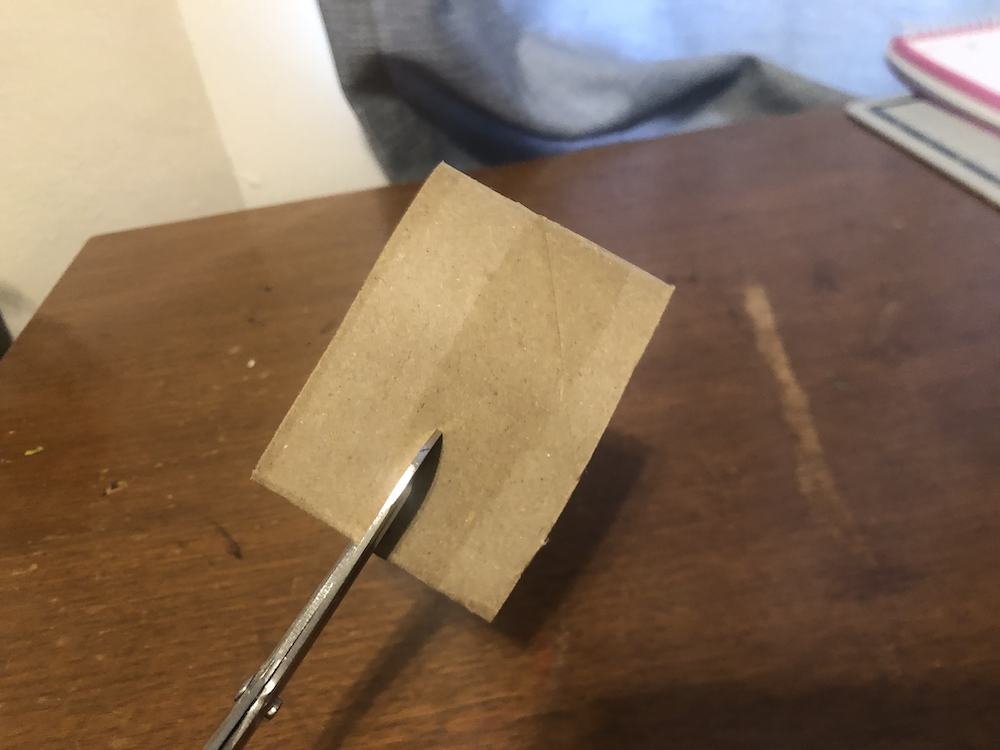
Step 1: flatten toilet paper roll
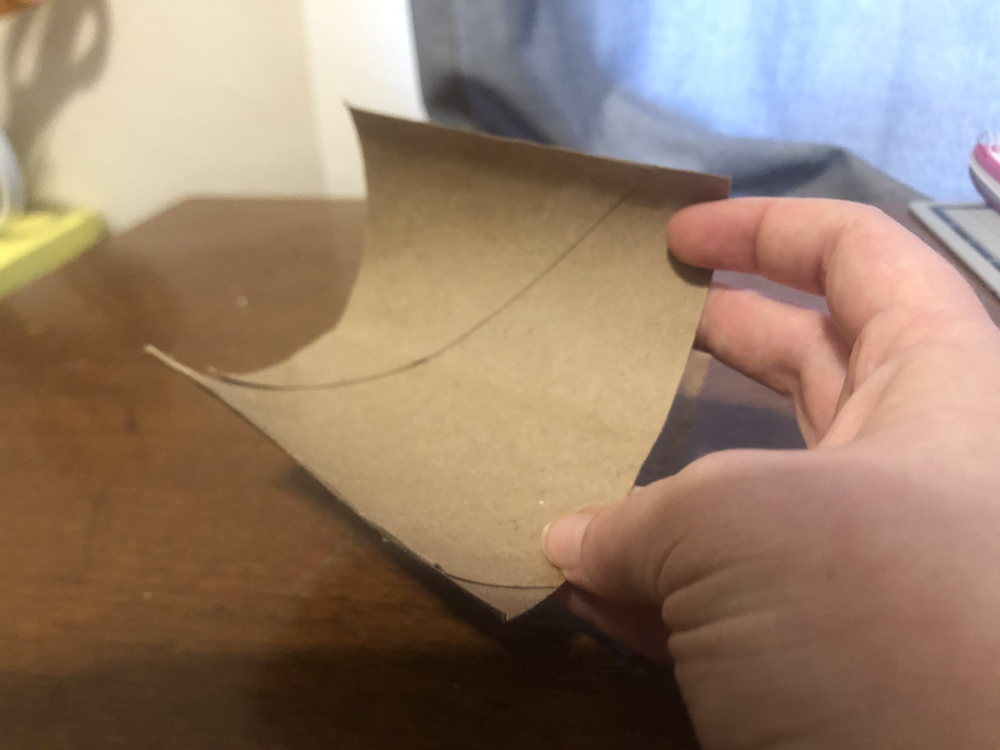
Step 2: cut along one of the seams
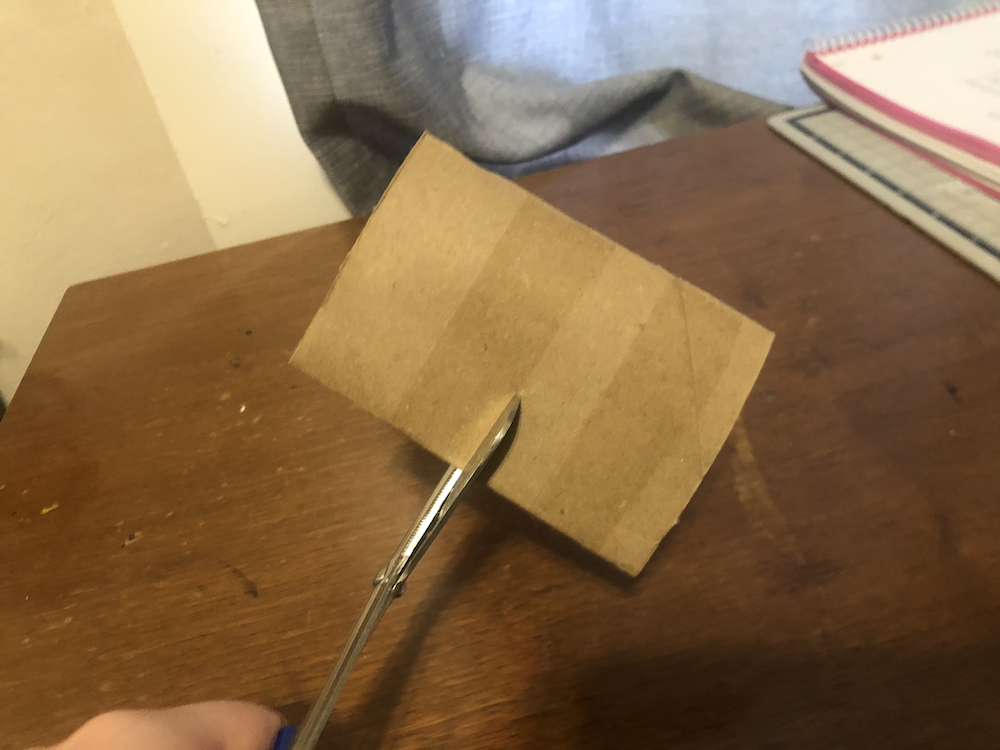
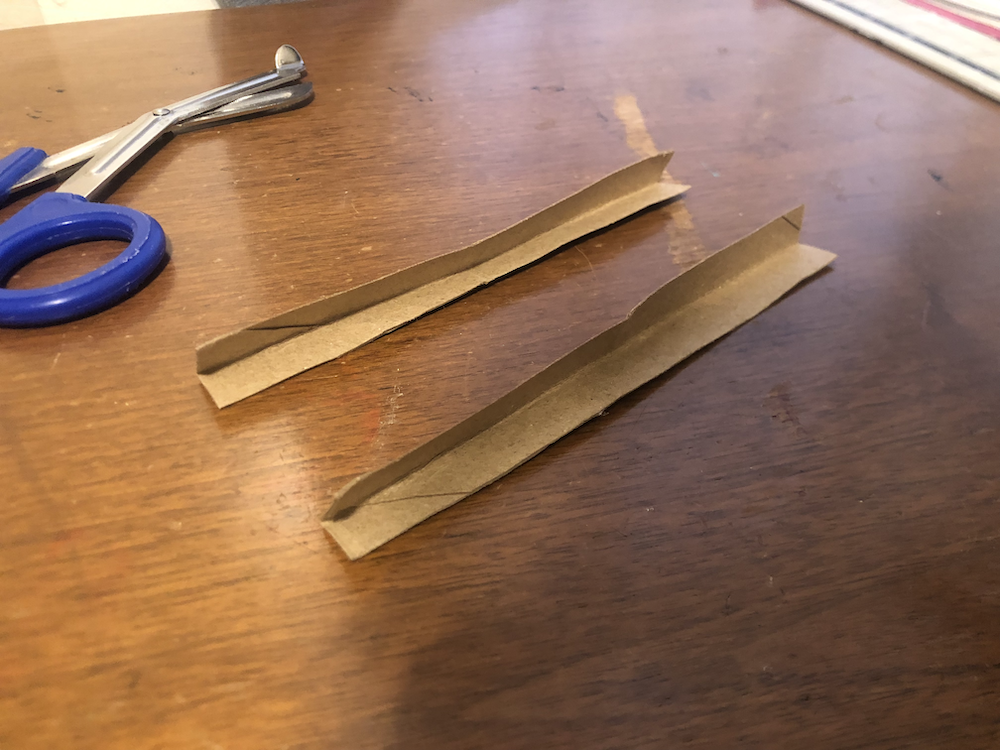
Step 3: cut in half
Step 4: cut in half again
Step 5: open up each strip and fold into a thin "v", and unfold
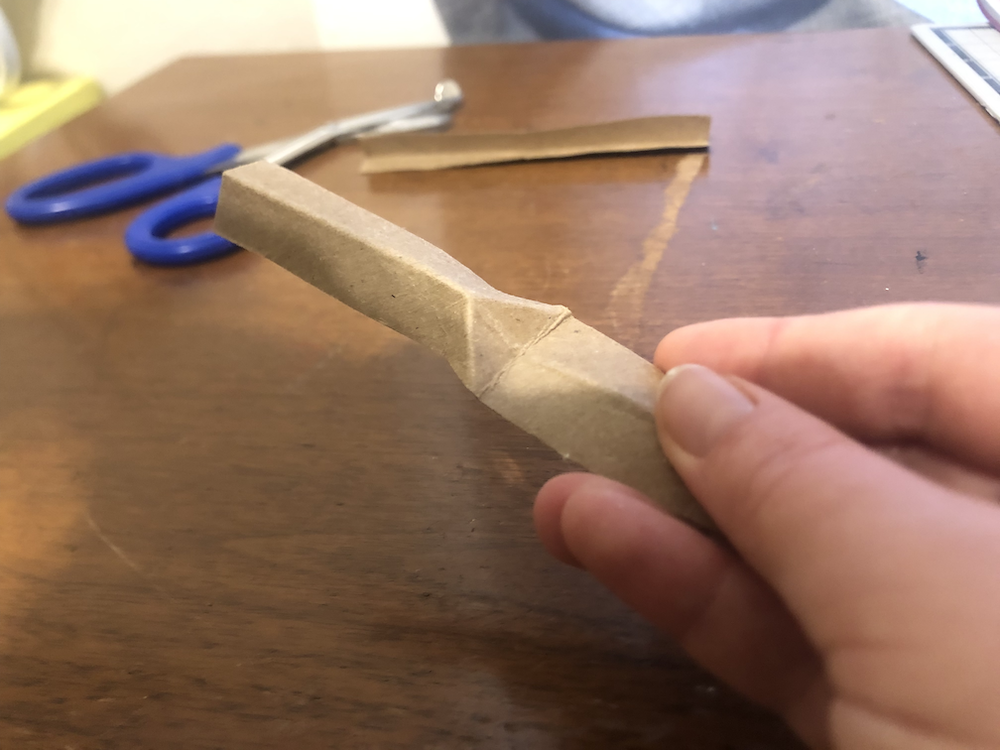
Step 6: fold along the existing crease, and add two 45 degree creases from the center crease
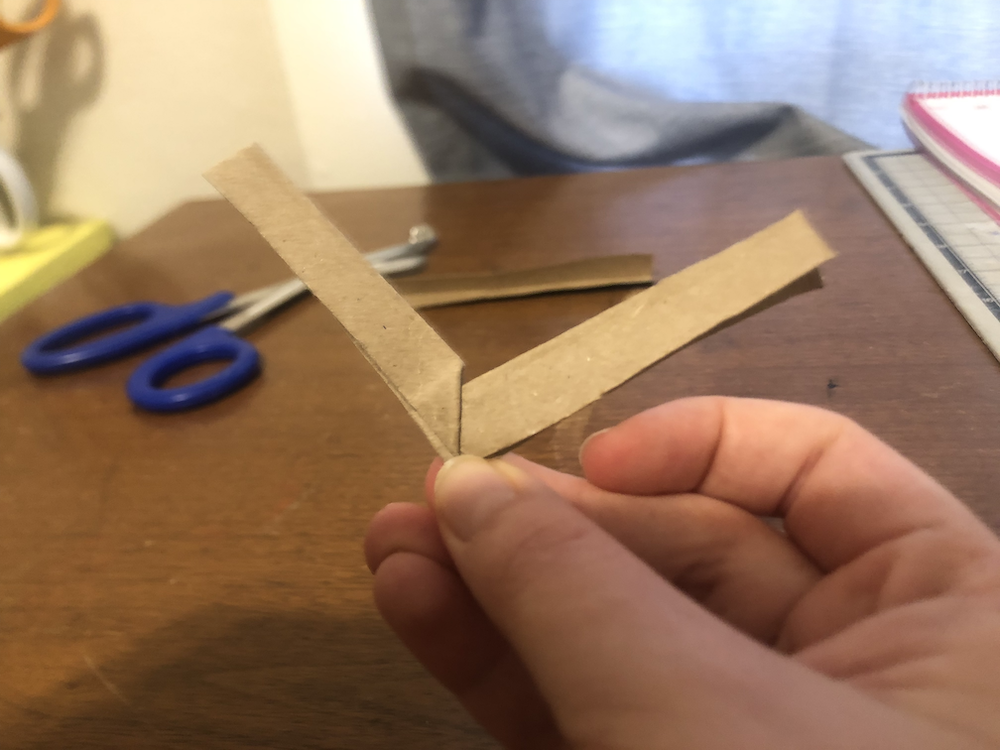
Step 7: following the creases, fold into a right angle
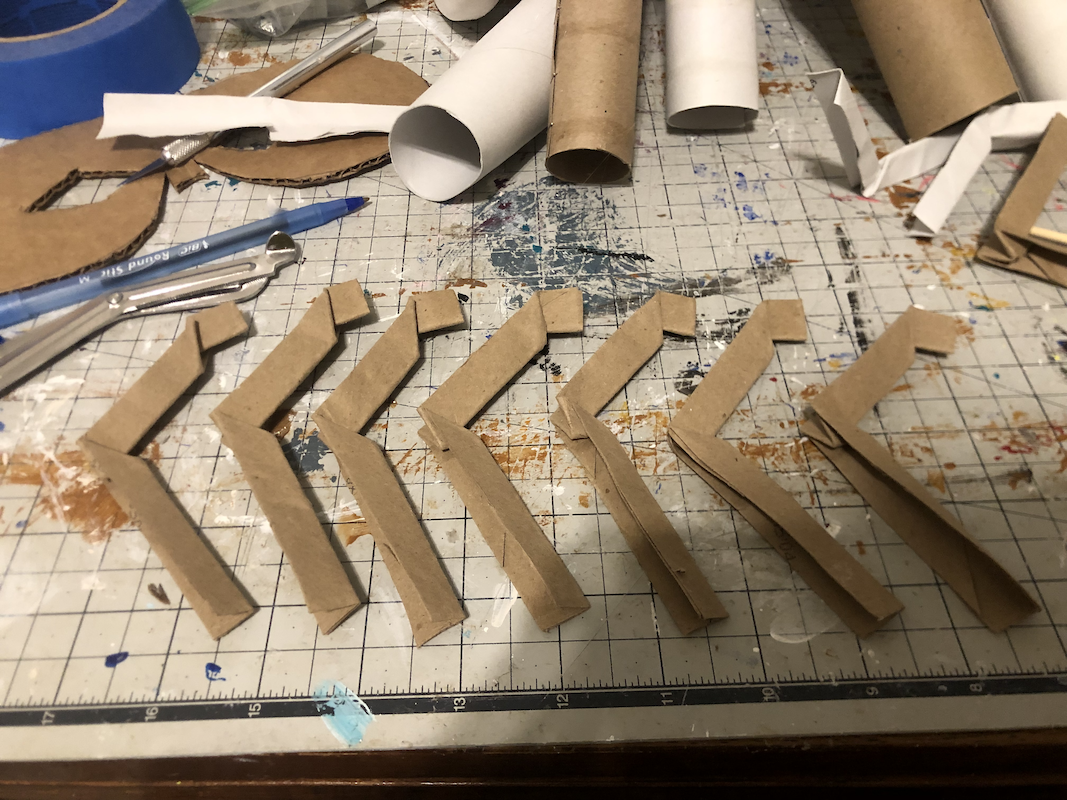
Make lots!
After making one knuckle, make another closer to the end. Make 10, naturally. Cut 2 of the fingers slightly smaller for the pinkies, 2 for the pointers, and 2 with only one knuckle for the thumbs.
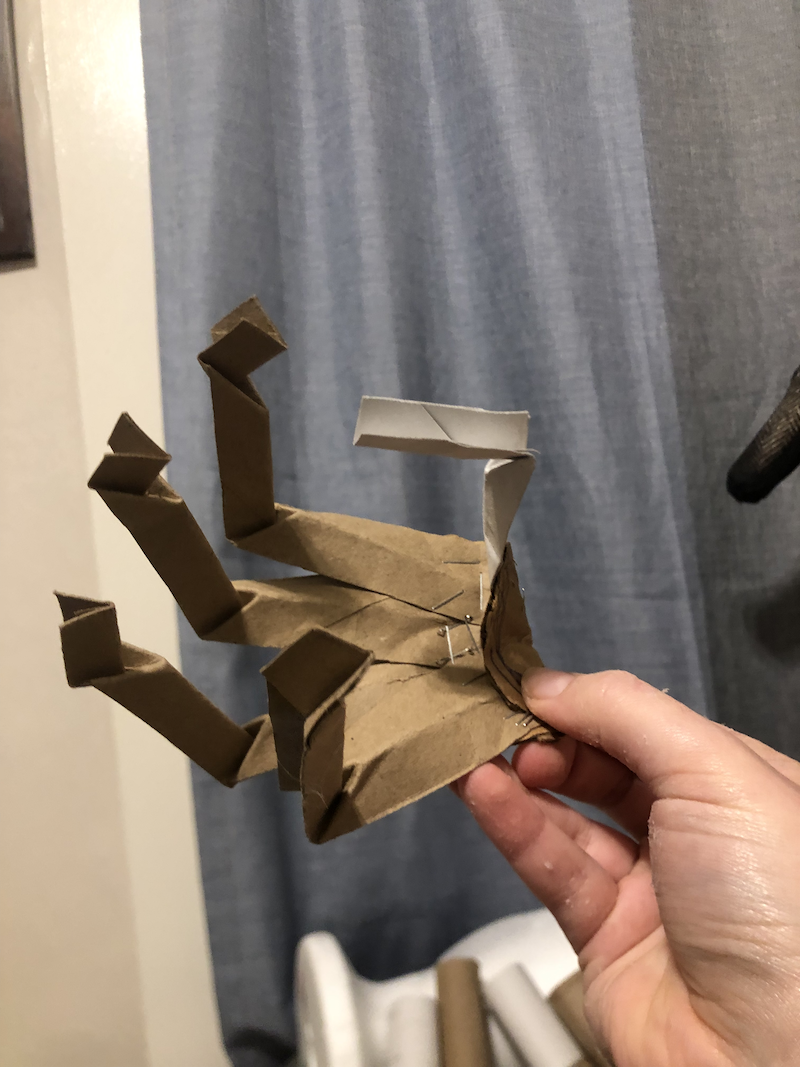
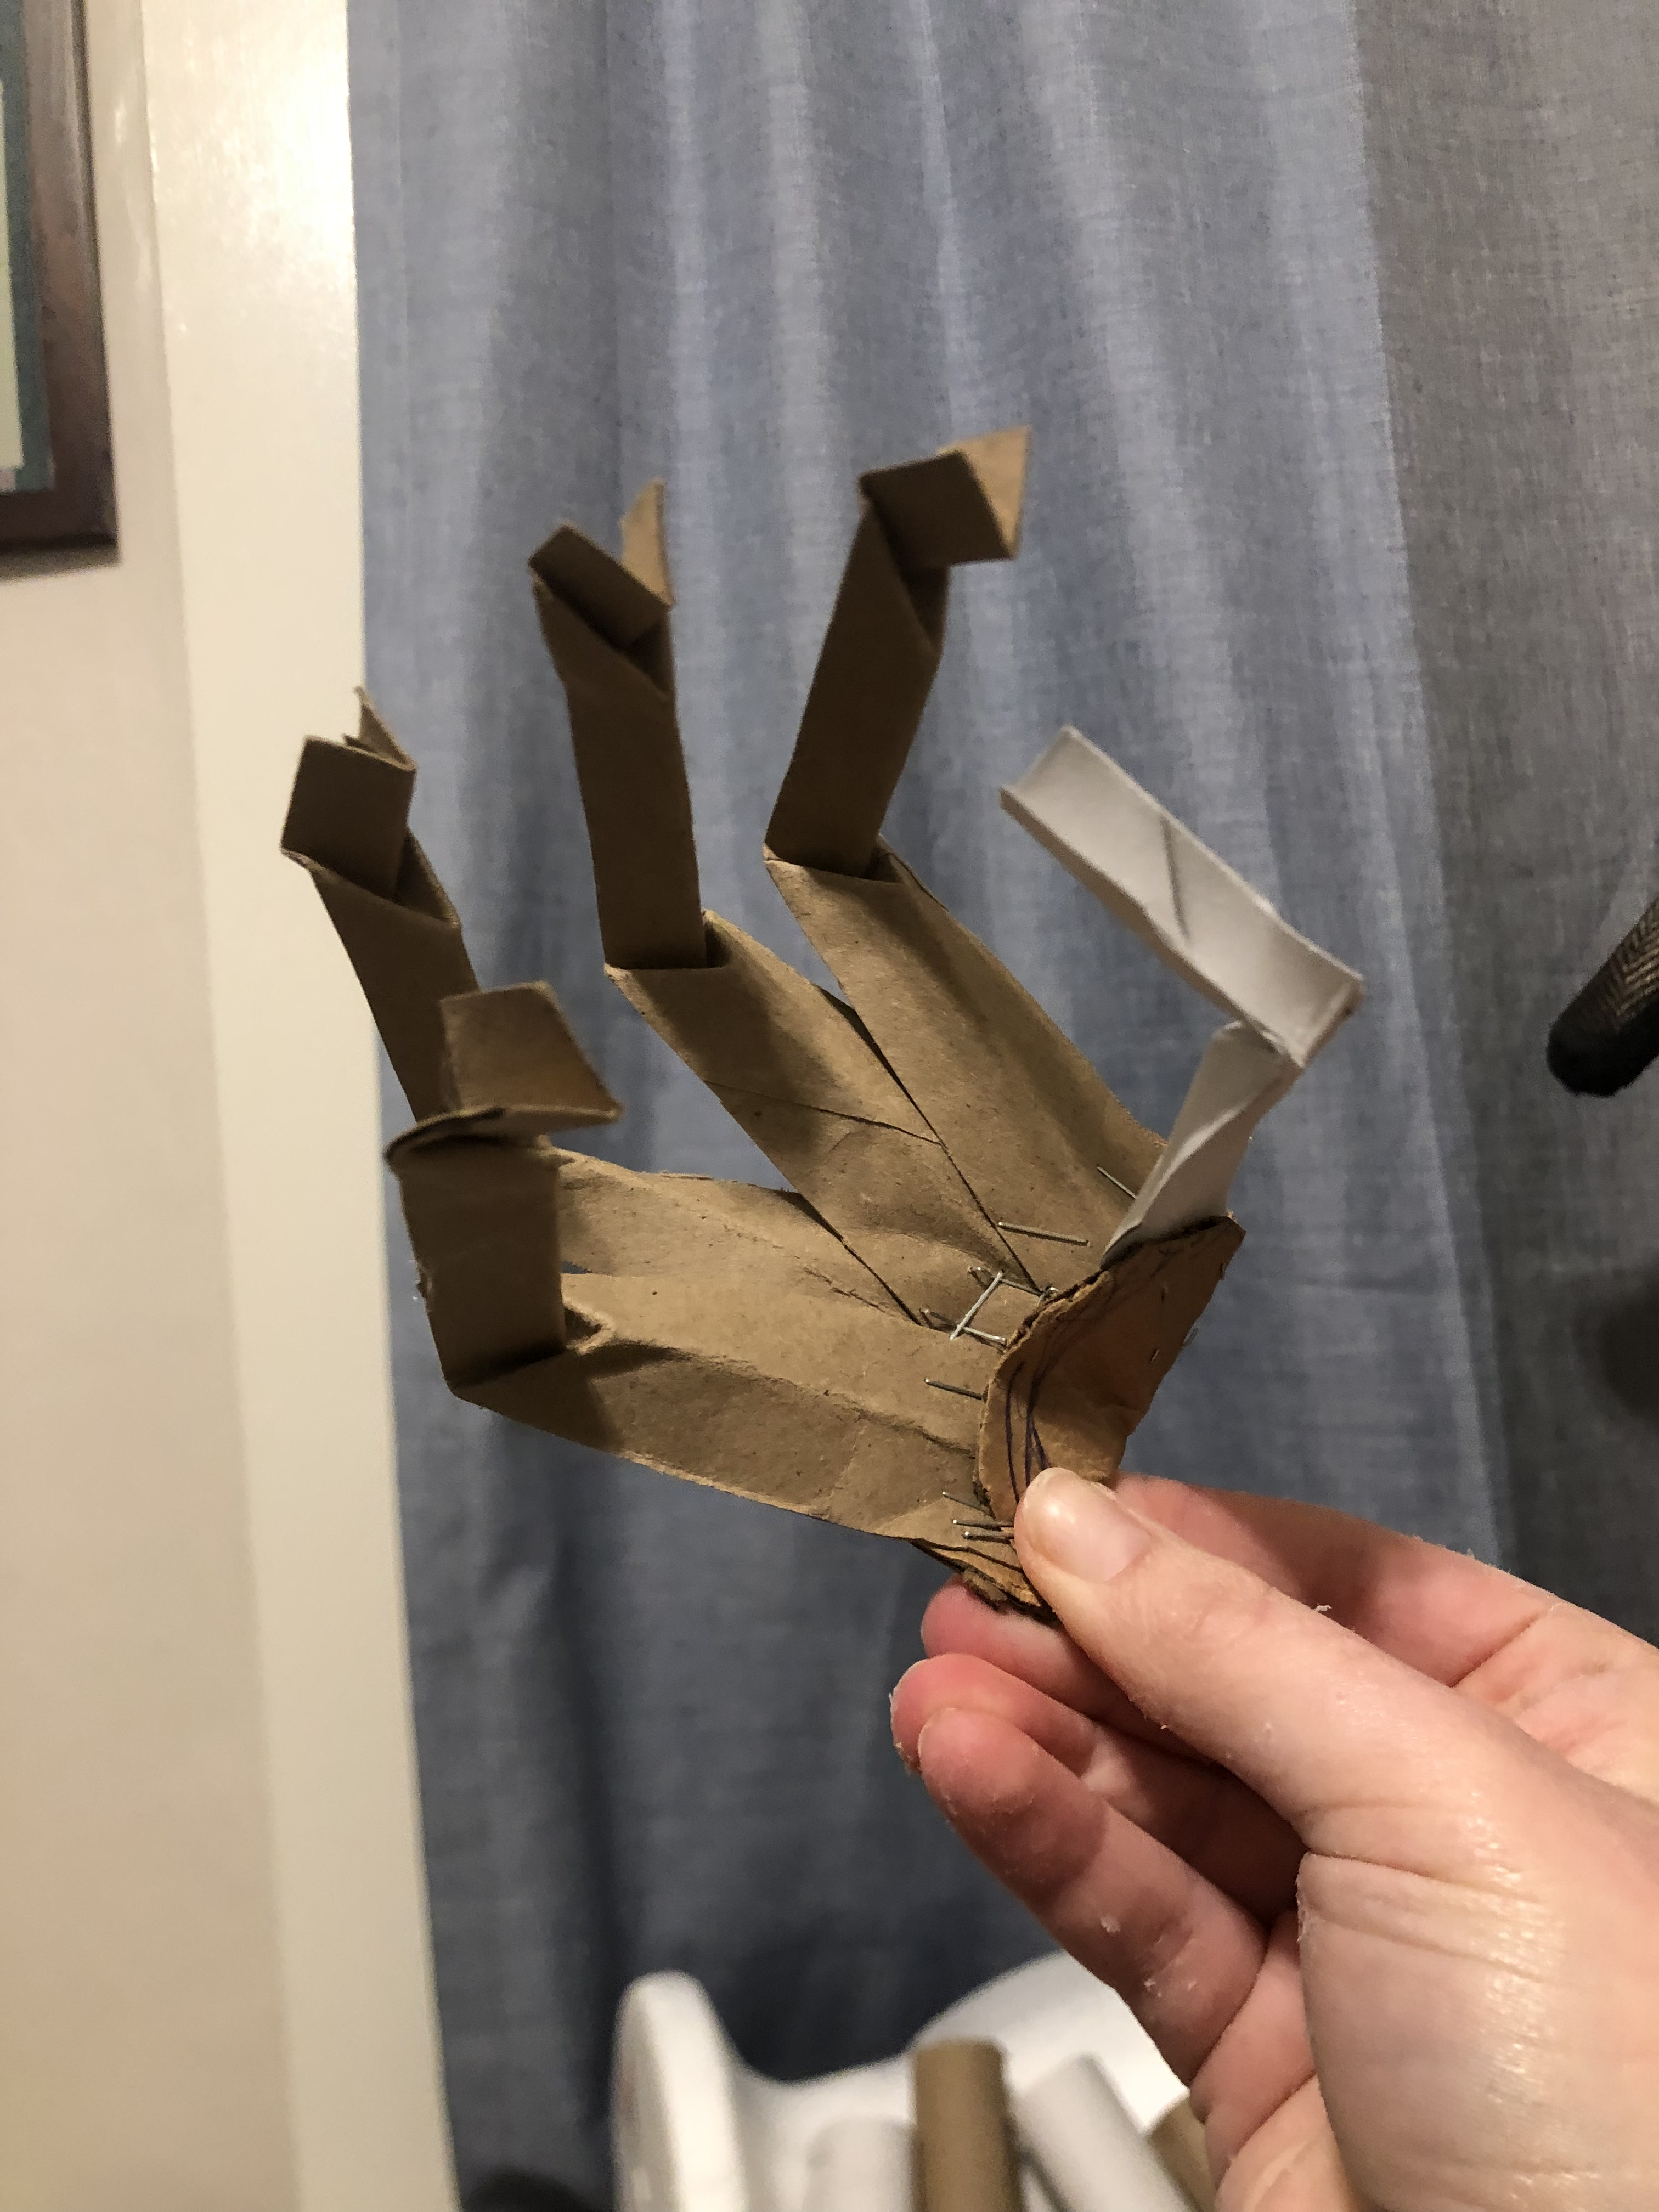
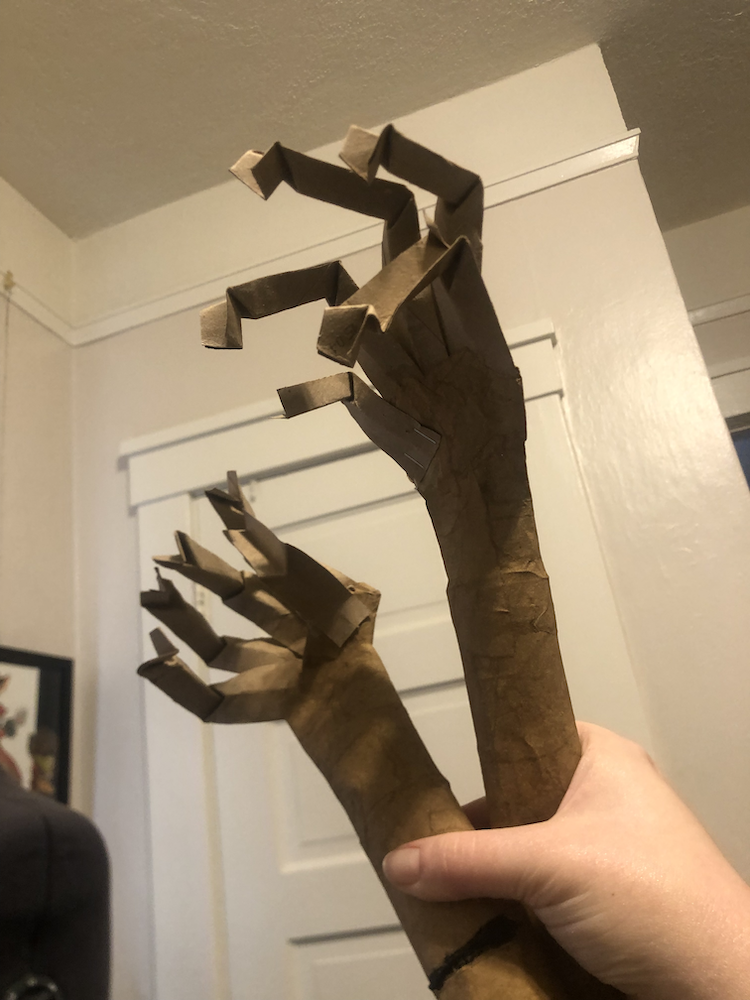
Next, cut a small circle for the palms and attach the fingers. I folded one of the palms in half and attached the thumb to the opposite side, to curve the fingers into a holding position.
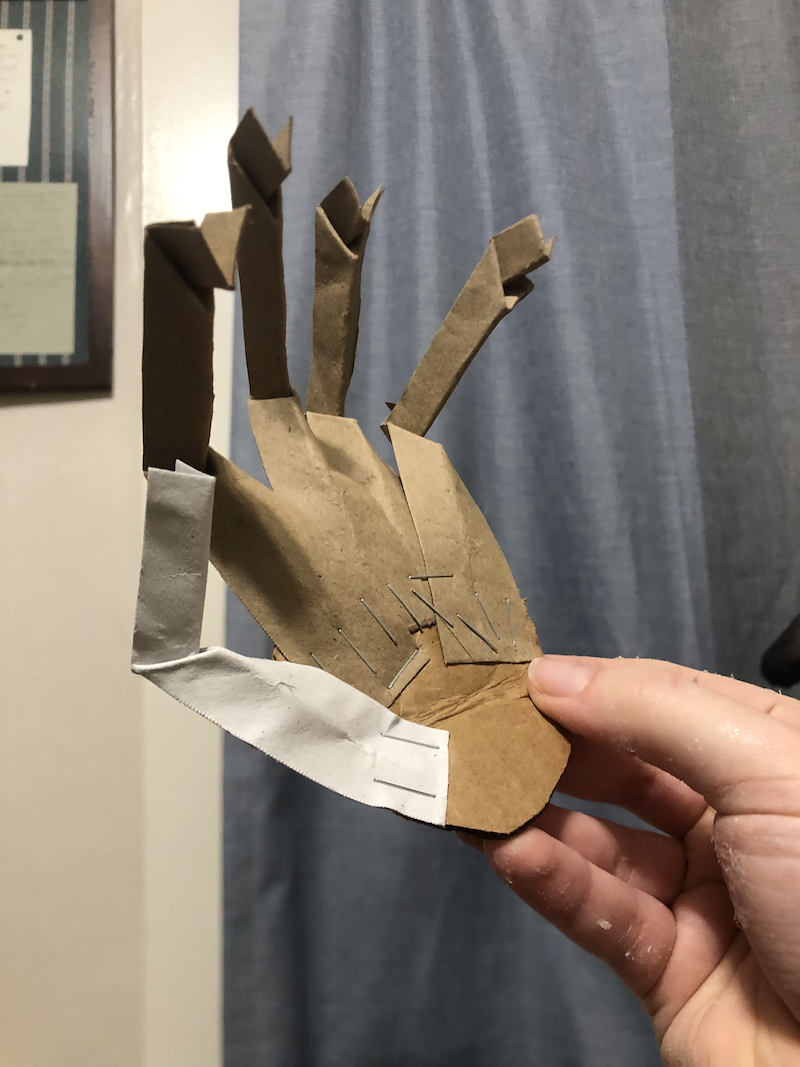
Open hand

Closed hand
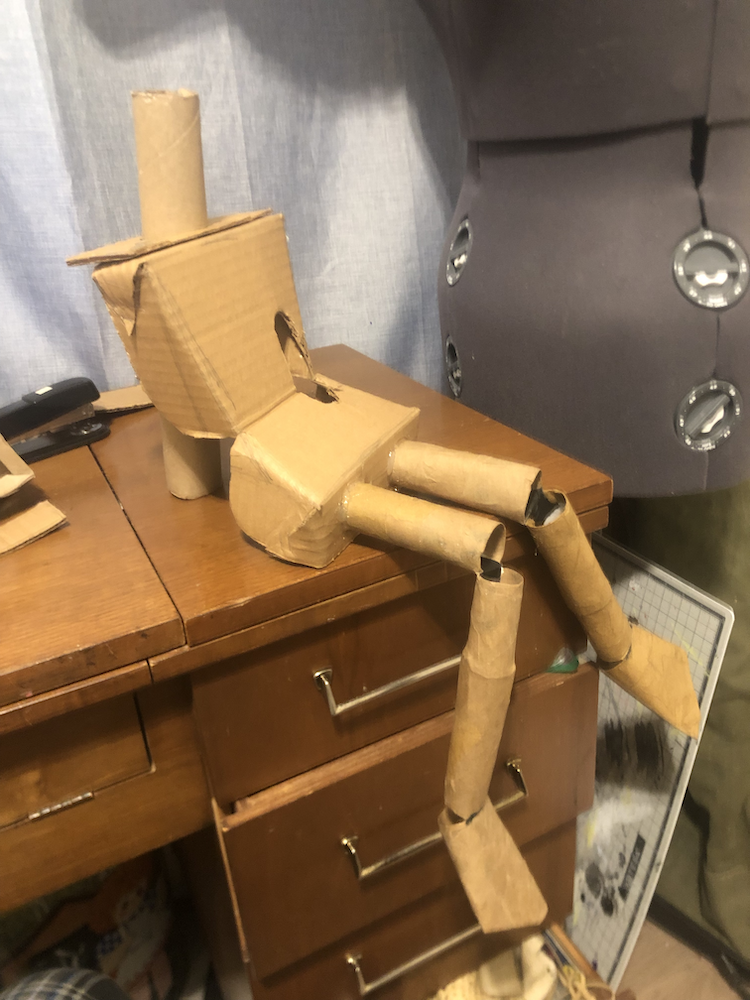
Limbs
The arms, legs, and feet are also toilet paper tubes, cut and re-attached to be smaller. The joints are made of gaff tape on either side. To cover up the staples and make them sturdier, I covered the majority of the limbs in paper mache.
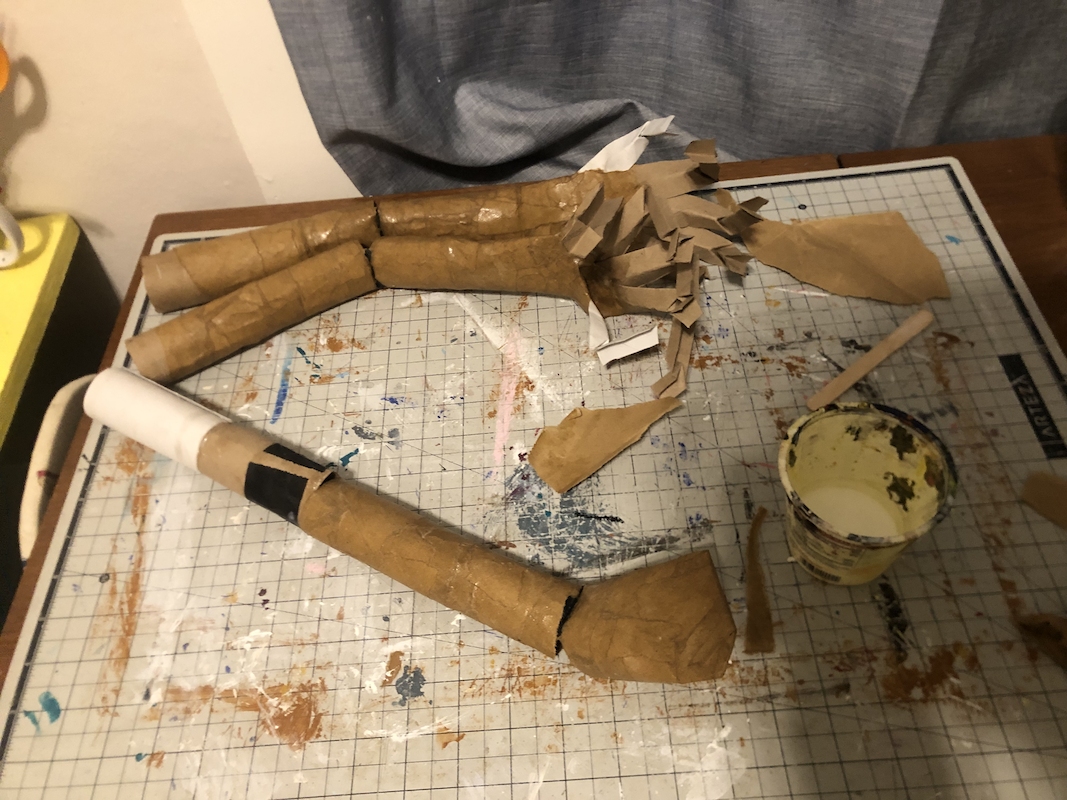
I decided I didn't want to paint the entirety of his body just to make it wood grain, and thought has anyone ever made a prightly painted Pinocchio? One who isn't just bare or stained wood? A new idea for my design came, he would be a once brightly-painted puppet, with that paint now fading slightly and chipped, so I could just dry-brush all the visible cardboard. Since I had already covered the limbs with natural paper, those weren't an issue, but the lighter tp rolls I had used for the thumbs stood out like... well... you get it. I decided to rip these off and replace them with more natural colored paper.
Any need for creepy cardboard hands I can make in about 20 minutes?
Body
Keeping it simple stupid. The body is an open-faced box, I sketched the shape of the torso and included large tabs along the sides to fold and secure into a 3D shape. The seam where the hips meet makes a good articulation joint, and allows him to sit up.
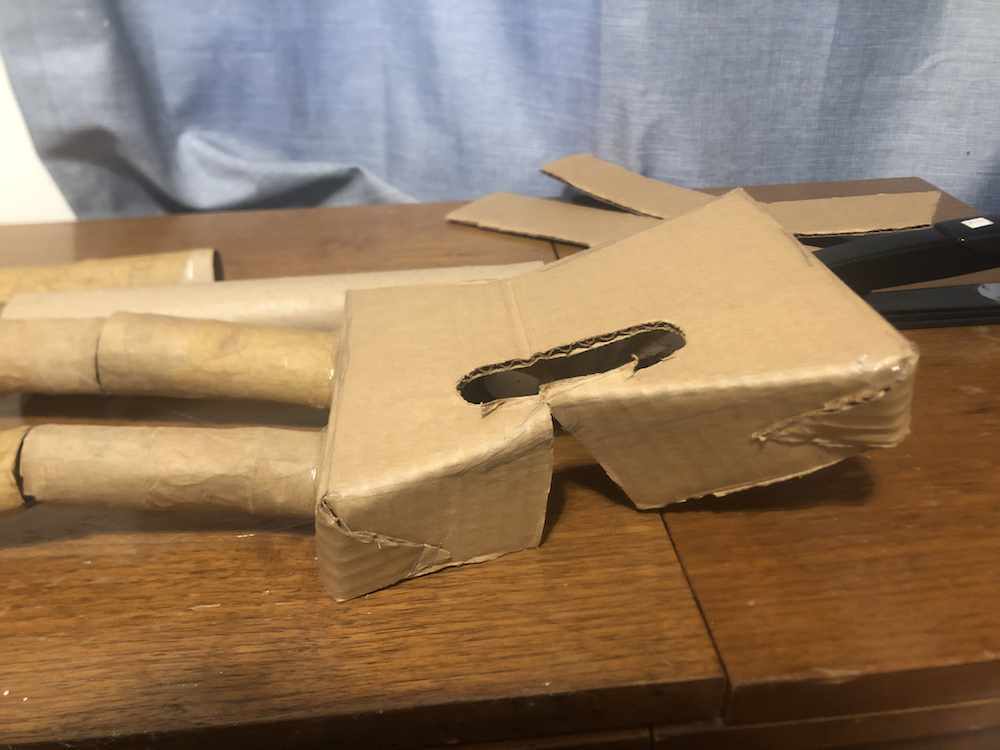
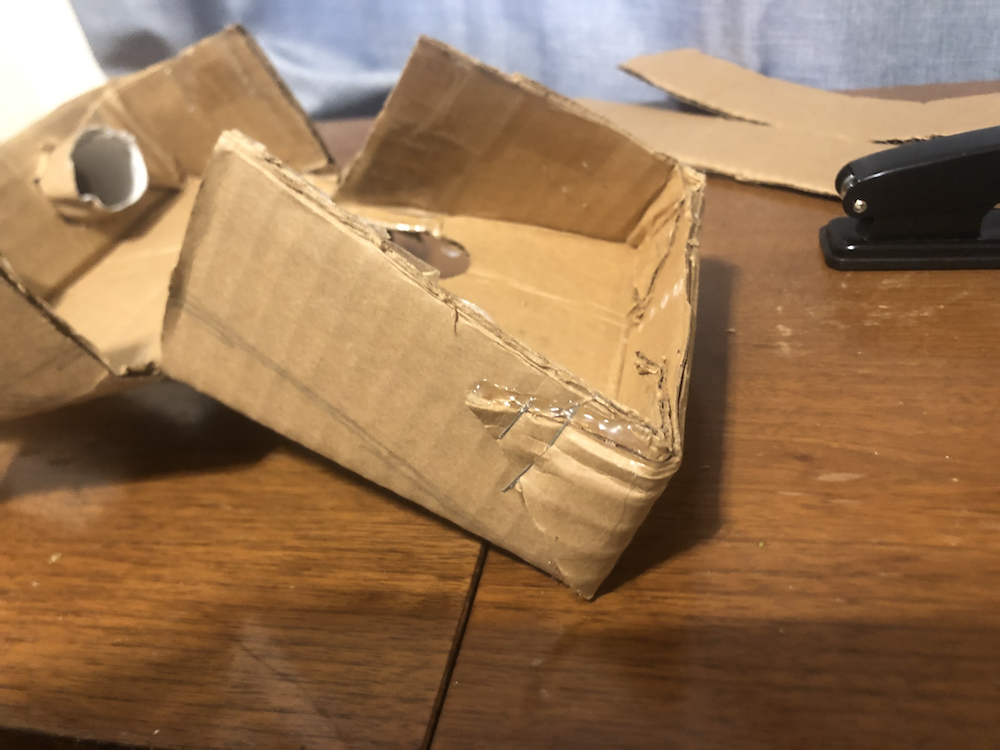
Close up on the corners, folded over and and attached
The other day at Wildland roots' puppet lab, we were talking about how important it can be to actually limit the movement of the limbs. Even if more movement sounds realisitc, most of the time you don't have control over 100% of the puppet's actions. When you're just holding the head and one arm of a bunraku puppet, you don't want the legs twisting sideways, even if humans have the ability to do so. Limiting legs to simple back and forth movement, stopping joints from going too far, is the other side of the coin. Pinocchio's legs are super simple, because I don't plan on him needing to walk or sit cross-legged or do any complext leg movements, and I'd rather make sure they aren't bending in weird directions at the slightest nudge.
He's also a little pigeon-toed, that's on purpose. I think it makes him more childish, and I like the way his legs angle sideways when he sits.
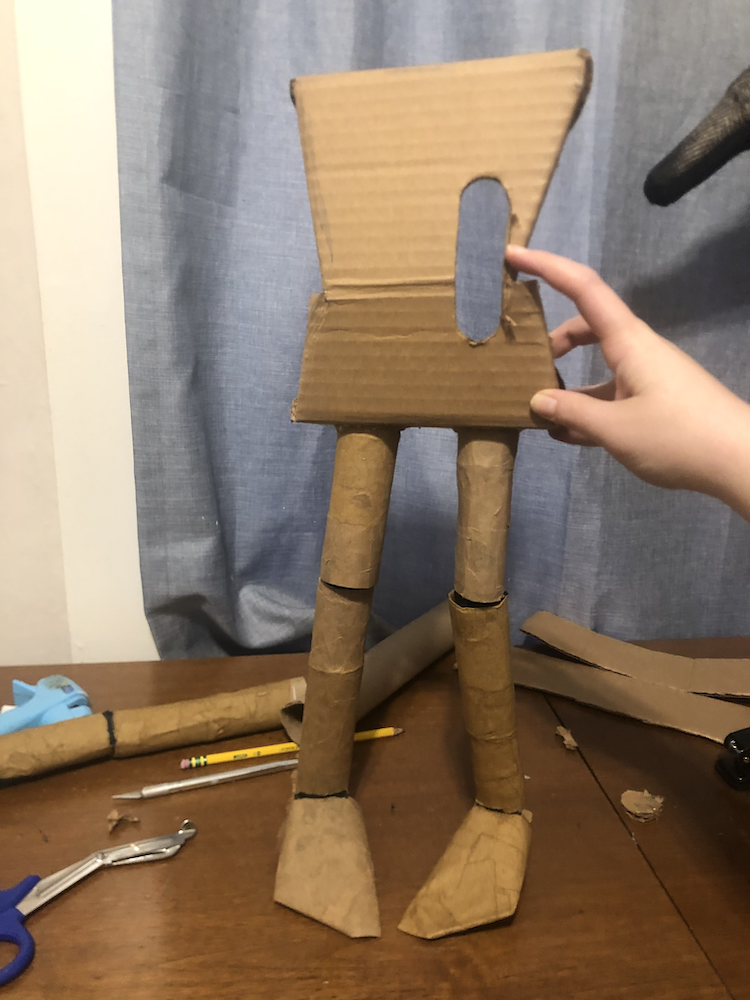
At this point, I found the suitcase I plan to carry them in, and realized he's getting a little long to fit. I will likely make his head removeable, or possibly his legs.
Head
My friends November and Ronnie both helped me with some sketches for the head shape and facial expression!
I started by making a large cone out of creased cardboard, and cut off sections of the top and bottom until I had a slightly tapered cylinder. With a paper towel tube for the neck, I cut slits in both the tube and the cardboard that would slot into each other, making a loose joint so the glue and paper mache weren't doing all the work. I cut a long trangle for his nose and attached it similarly. Small rounded cones make up his cheeks.
Time to paper mache over the head too!
After my first layer of paper mache, I discovered his head was WAY too big! So I cut the back half off and set his face farther in, shrinking the whole things down by a couple inches, and cut some extra from the top. I then paper mache'd again over the new seams, and cleaned up the first layer.
Shoes
After trying on the head and staring at him for a while, his small feet seemed incredibly unbalanced. I decided he needed real sculpted shoes after all. Using two toilet paper tubes at a wide angle, I cobbled together a pair of pointed shoes. The tips are just the ends of the tubes cut and twisted into a point.
After the paper mache coats were finished, I cut carefully around the joints of the old feet and glued the hinge onto the front inside of his new boots. These new joints were strengthened again with gaff tape, and the edges paper mache'd over.
Paint
Why should Pinocchio have normal colors? I want mine to be bright and colorful like a puppet meant o be seen on stage from far away and appeal to children. I went through many different ideas fo skin tones, but wanted to stay away from any warm tones that might feel like caricatures of existing skin tones, green would make him look sick, purple was too dark, so I landed on a bright cyan. Since this Pinocchio is a little old and worn, I used the existing brown tone of the paper as the wood base color and dry-brushed my paints over it. After an initial coat, I mixed a little more green in to the next layer to create an imperceptible variation. He also got some green "moss", and a watered-down wash of much darker brown to fill in the crevices and create shadows.
His shoes are a dark maroon, red I felt would be too bright. They also got a dark wash - he's been tromping through the mud and dirt all the time after all! I painted white circles on his cheeks, and later came back with the same color as the shoes - very watered down to show the brush strokes and lighten the color.
Clothes
Patterns
I'm basing my Pinocchio's clothes off of the original illustrations, he's very clown-like, and wears a large coat, short pants, and a collar. For more color (and because I'm dedicated to this taking as long as possible, I guess) I wanted to go with a diamond patchwork design, like a harlequin!
I then discovered that a diamond patchwork is much harder to sew than a simple checkerboard patchwork, and every tutorial told me to sew each diamond individually. So I won't be doing that. It'll be a simple square patchwork, with the pattenr turned at a 45 degree angle.
I started off by measuring his body and all the lengths I wanted his clothes to be at. For his coat, I used a circle skirt calculator and created the pattern out of thick canvas. Through some draping and pinning, I determined the shoulders needed to be taken in a little, and added side seams for the arms. The arms are also cones, with the tops cut off at an angle and test pinned to my pattern fabric.
I originally intended to use this canvas as a lining, since I want the coat to have some weight to it and a thicker drape than quilt cotton, but this canvas was WAY too thick. I did end up using it as a pattern, and cut out a new test/lining from some scrap brown cotton. This was a success!
For the pants, I used the same simple measurements that I do for all my doll and puppet patterns with loose clothes. It's just two rectangles sewn at the sides and the crotch. I didn't need to make a test.
Patchwork
Oh boy!
I went through my fabric scrap collection, looking for anything I liked but wasn't too attached to. I then paired down these findings until I had a color palette I approved of. It's a sort of purple-red-green with a little blue. The purple matches his shoes, the blue and green match his body, the red adds more brightness, I think it all came together pretty well! And I got to use up a ton of scraps.
I started by cutting my scraps into 3-inch strips of at least 8 inches in length. I sorted these roughly by length, and started to create groups. Each group needs to have the same number of strips, I used 8. Lay out each group and make sure the colors are in an acceptable order, and pin in place to keep the order correct. It doesn't matter if each of the groups are different lengths, as long as all the strips in each group are approximately the same.
After sewing these groups, iron!!!
Next, cut each group into the same width of strips - 3 inches again for me. Lengthwise now, so each strip contains a stripe of all the strips sewn together. Group them again, making sure to check the squares so no two of the same pattern are lining up.
Yes, mine is messy, I don't think Gepetto was a particulary good sewist. He was a wood carver first, after all. Or maybe it was a scrap quilt that was wearing out? Either way, for this project I don't care much about lining up my corners, or keeping the pattern absolutely perfect, or the different stretch of the different fabrics. It's a scrap patchwork!
Once all my strips were sewn back together, I had 6 large rectangles each 16 inches (well, 17 inches includeing the seam allowance). I cleaned up the edges and sewed them into one large sheet.
Halfway through this process, im thinking about what if you alternated strip widths? Like if you did 2" and 4" and sewed them alternating, and then cut them again alternating 2" and 4" to make a sort of tartan pattern of thin and thick stripes meeting at the squares. Would that be too busy with a chaotic patchwork? Or really cool? I should try that next time! I think it would look something like a gingham or tartan pattern, especially if I only used 2-3 colors.
Construction
Pattern cutting time! I ended up with just enough of the patchwork.
After sewing together the coat and pants, I let him try them on. They look great! But incredibly busy, so I'm definitely going with a solid color or simple pattern trim to break it up.
I next cut out the same patterns in fleece, to give it that extra weight and bulk I'm looking for.
Using the last scrap of my patchwork fabric, I cut the largest quarter circle possible to make his hat. I had to piece together the last scrap fleece, and cut an identical shape. After sewing it into a cone, it fit his head with a little room to spare, which is perfect. I want to leave his eyes removeable so that they can be replaced for different shows, so his hat will be elastic and able to be removed.
Two Image Columns
this is a caption. with a link.
this is a caption. with a link.
Three Image Columns
Four Image Columns
this is a caption. with a link.
this is a caption. with a link.
this is a caption. with a link.
this is a caption. with a link.