WARNING: this page contains discussion and photos of dead animals. No real gore, cartoon gore.
Rat King Puppets
2024 - 2025
Gallery
Concept & Design
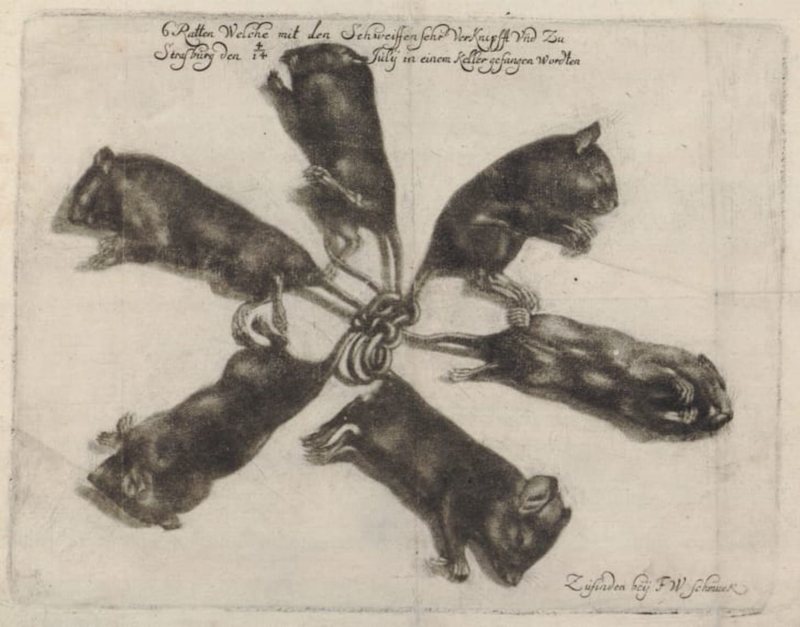
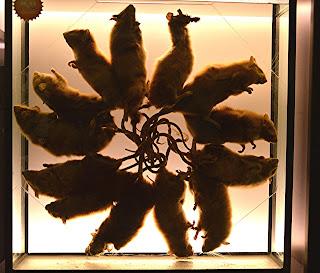
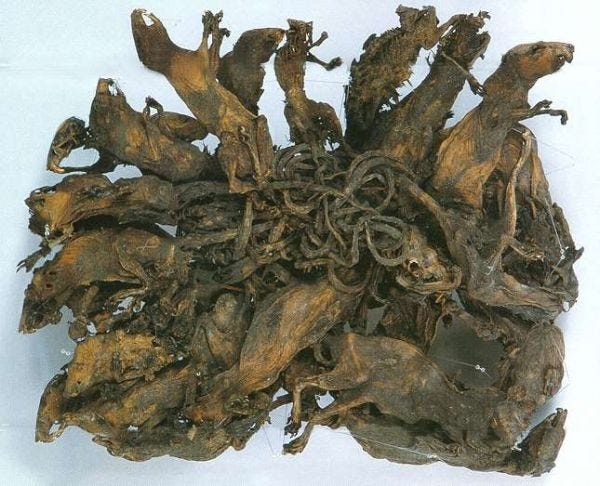
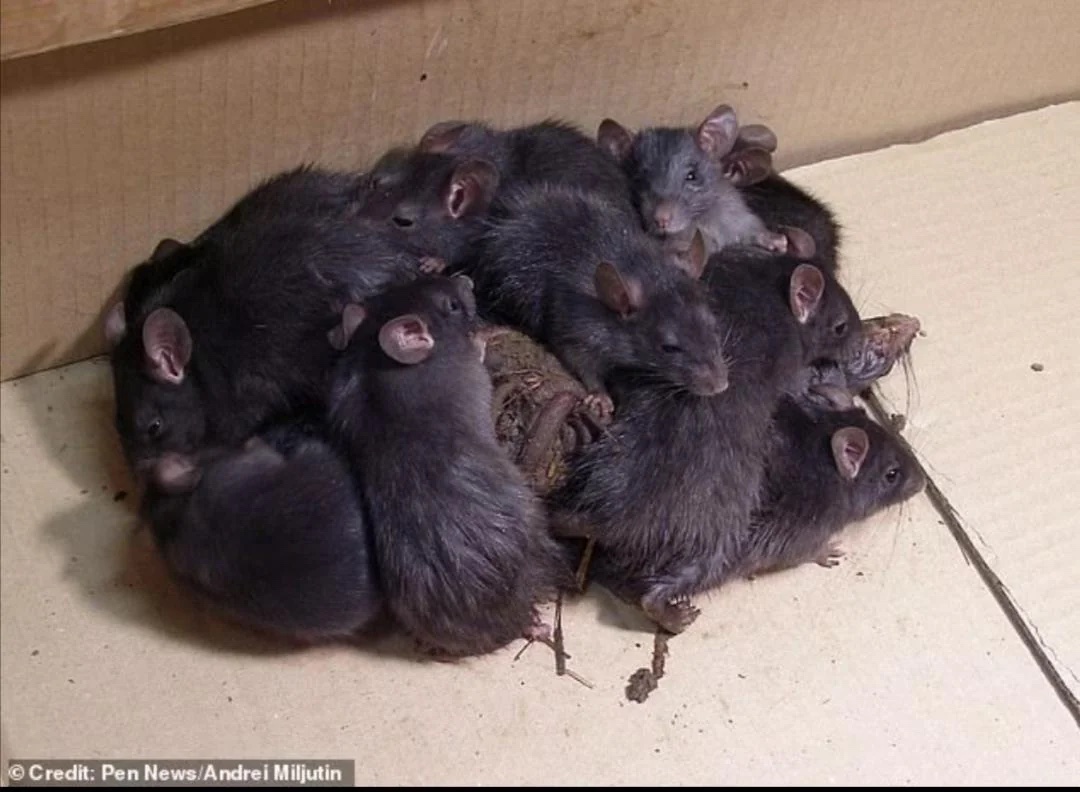
I created these rat puppets for a show I'm currently workshoping, in-progress title is "Rat King" but I'd like to come up with something more mysterious. The subject of this show is a rat king, a real-life phenomena where rats will get stuck together via their tails and strugle until they starve. While working on the script and the visuals, I started with a lot of photos and articles on the subject.
My goal is to experiment with concepts like struggling to remove yourself from relationships, manipulative groups, and how even after physically removing yourself from a situation, you leave a part of you behind. The visual in my head is of someone cutting off the tails of the rats, or them doing it themselves, representing how the initial pain of removing yourself from a situation is necessary for long term happiness. I also see a single final rat still being connected to the knot of tails, representing their inability to put the past behind them and allow themselves to find new relationships.
Choosing a Puppetry Style
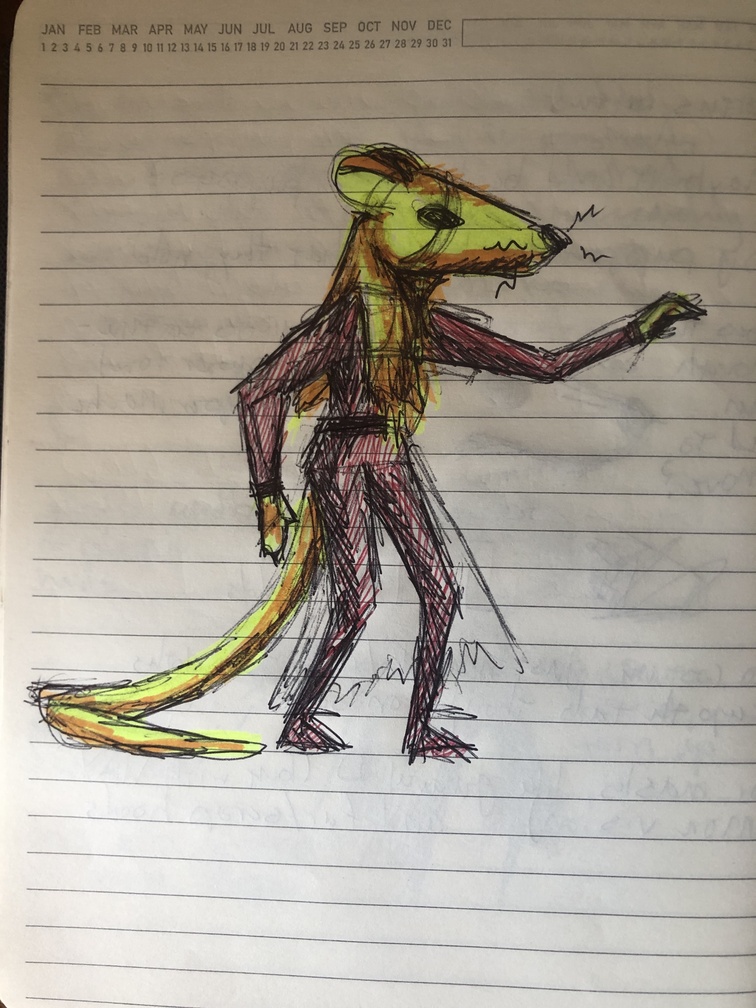
When I originally devised the visuals for the show, I was imagining people in rat costumes -

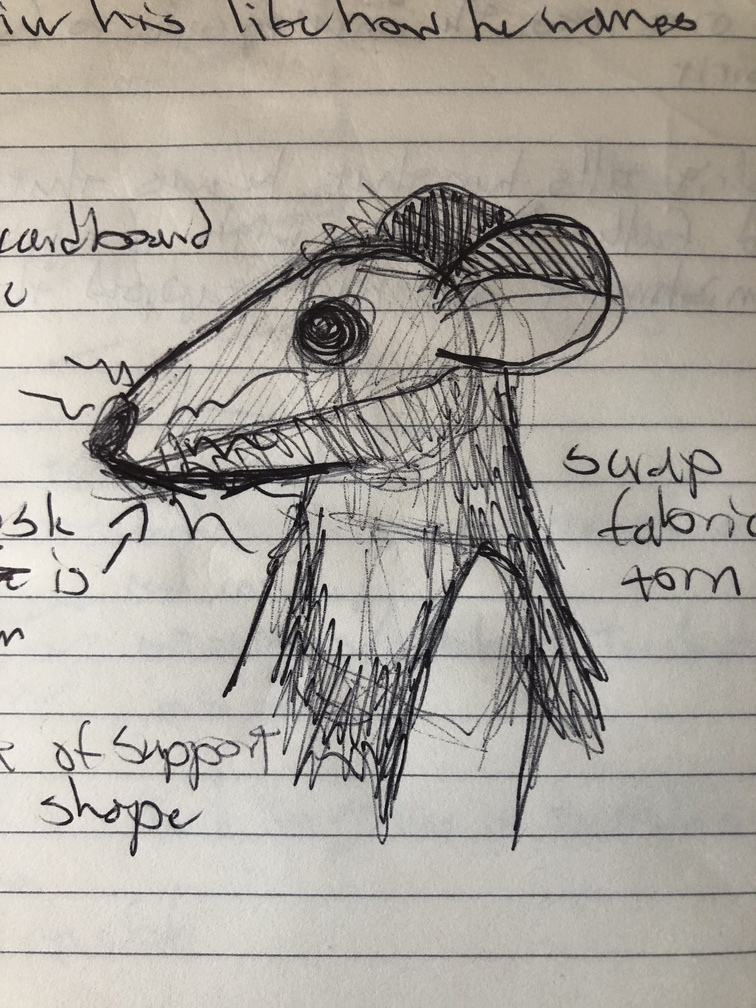
- which then shifted to rat masks -
- until I remembered how much I love puppets and how strongly I've been wanting to make my own puppet show for a long time. So I reimagined my concept with puppets, and began sketching to figure out how to show this many rats onstage at once with a very limited number of puppeteers (preferably one).
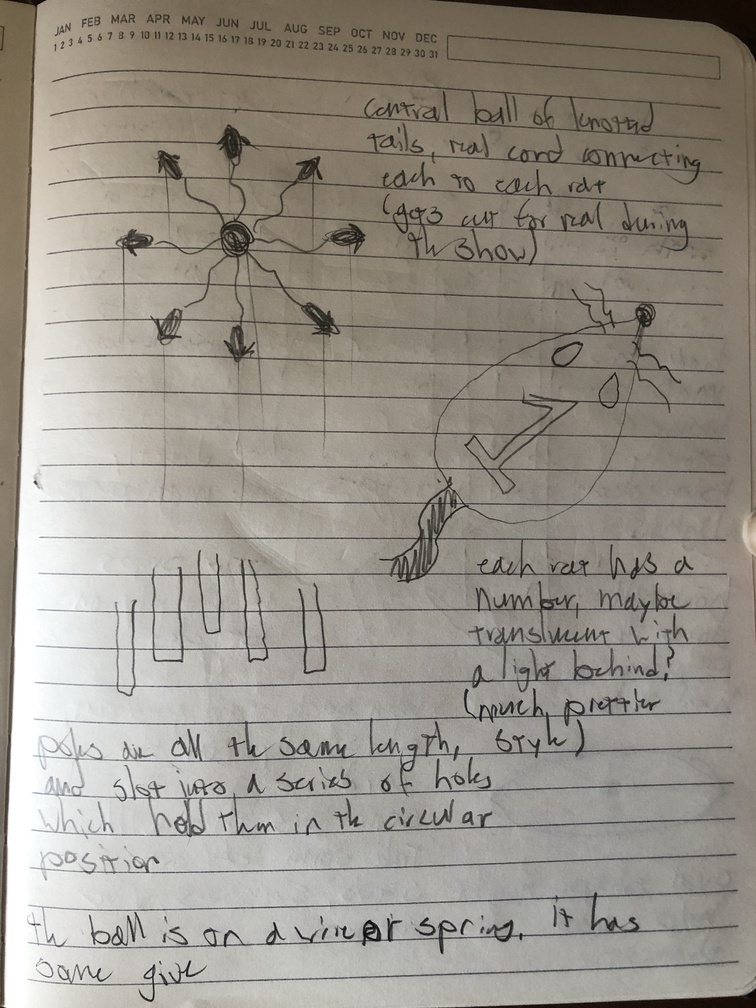
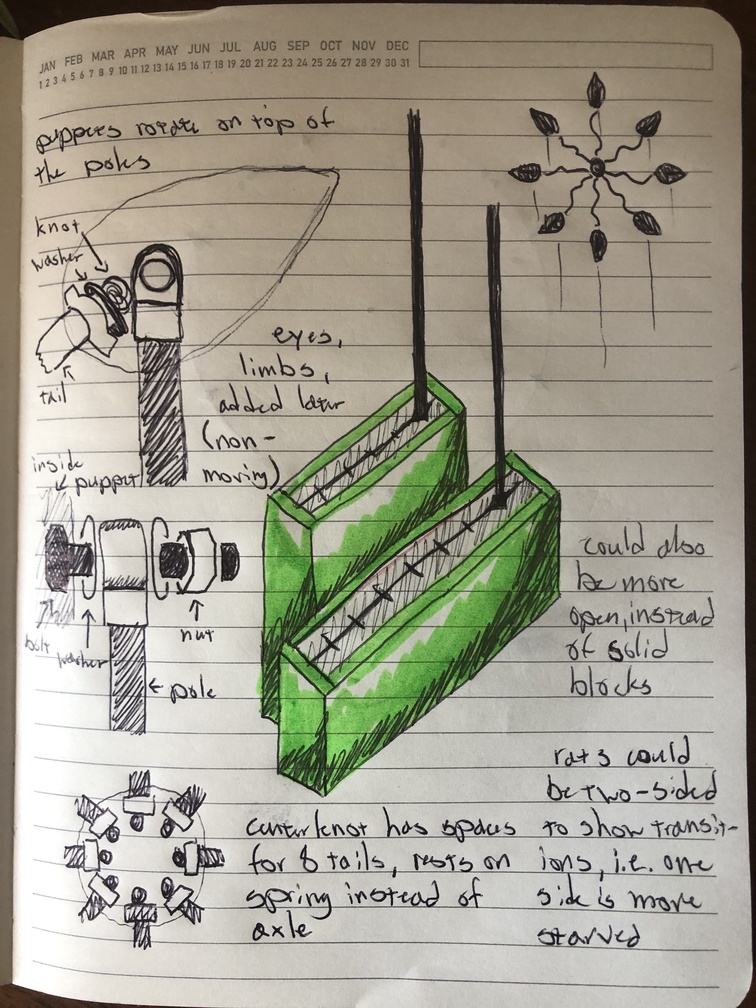
My first thoughts involved a shadow play, with puppets held by sticks hidden behind a sheet. But then I figured, why not remove the lighting issue and allow the show to be performed anywhere regardless of lighting constraints? But I decided to stick with the same method that shadow puppets use - sticks! I chose to built each 2d puppet on top of a pole, each of which would slot into a frame on the floor and would stand on their own. Then when puppeteering the individual rat, I could hold it from the back or take hold of the stick if it needed to exit the frame. In the middle would be the knot, possibly on its own stick but it may just hang in between the rats, supported by the ropes of the tails.
Another important aspect of the show is that I wanted to cut the tails for real. In the script, the rats must cut their own tails off to escape, and while my original ideas working with actors meant expensive sewn tails, working on a small scale means that they ccan be simple pieces of rope. Which can be cheaply bought, attached, cut, and replaced. So each rat, and also the ball of tails, need to be made in such a way that the tails can be removed and re-attached for each show.
To keep them as cheap as possible, I'll be using cardboard, scrap fabric, and materials from the hardware store.
I want to make them fluffy using scrap fabric and yarn. One of the driving themes for this show is texture, I want to highlight the unnerving nature of the sharp (or not-so-sharp) instruments that I'll be cutting their tails off with by making everything feel very soft and natural. Through soft yarn fur, rough rope tails, and cold shiny metal, I want it to be a tactile experience for the viewer even if they aren't actually feeling the puppets themselves.
As you could tell from the amount of tabs on this page, I did not stick with the rod puppet concept.
After mostly finishing the puppets in early 2025, I put them aside to work on other projects. While the pupepts were done, I still didn't have a script, and designing the way they would move was difficult without a solid idea of the show's format. So they got shoved in a closet for a while.
In fall of 2025, I had another opportunity to perform a new peice of mine, and decided to revist my rats. Through new bursts of inspiration I finished an outline for the script, discovering that I would need a new system of puppets in order to get the story across. For one, I needed the space for each rat to be a different puppetteer and actor. For two, I wanted them to be big. Really big. Big enough to be seen onstage from 30 feet away.
My plan at this point was to make hand puppets. I originally experimented with making standard size puppets out of a free pattern, but even with additional cardboard masks these were still too small. (Side note: I may return to the idea of a soft puppet with a paper mache style mask.) Time to go big! The rest of the new design is chronicled over on the new tab.
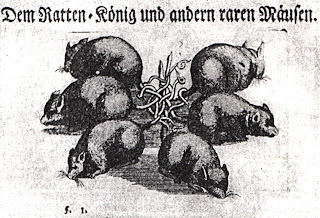
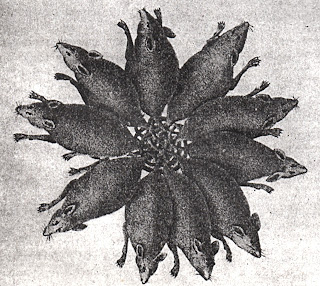
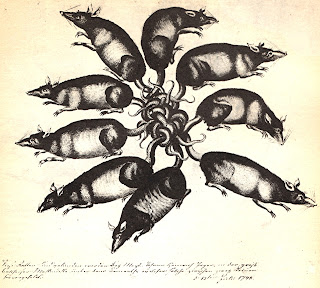
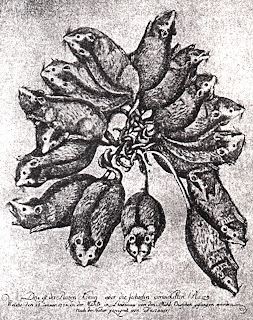
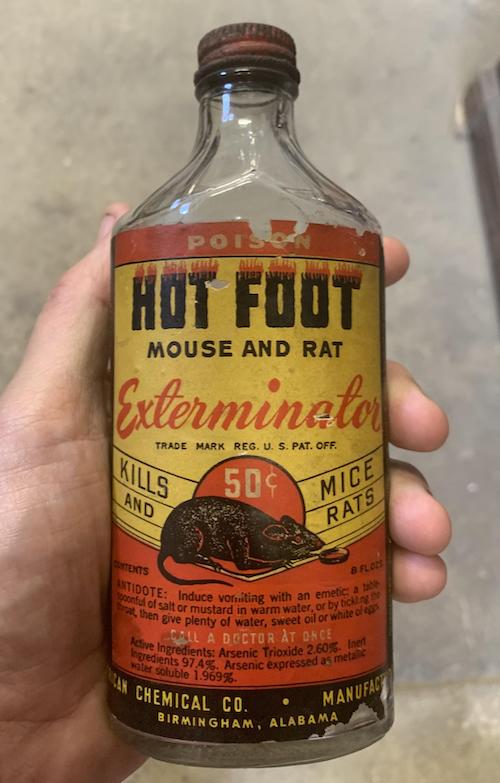
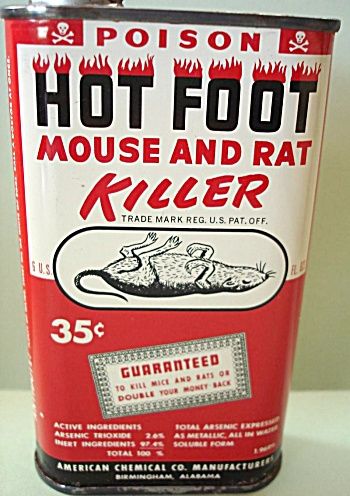
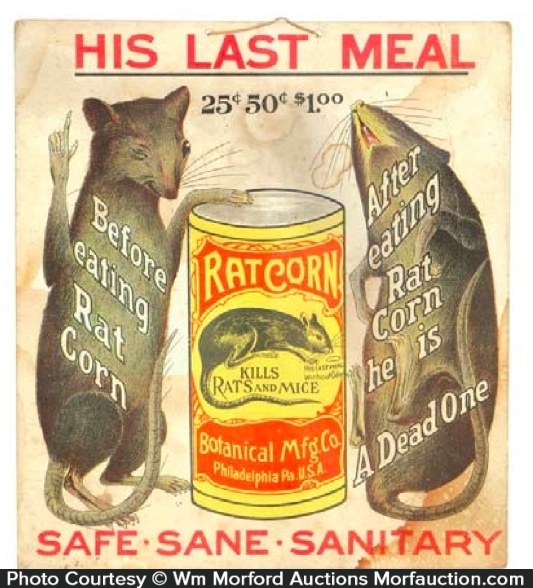
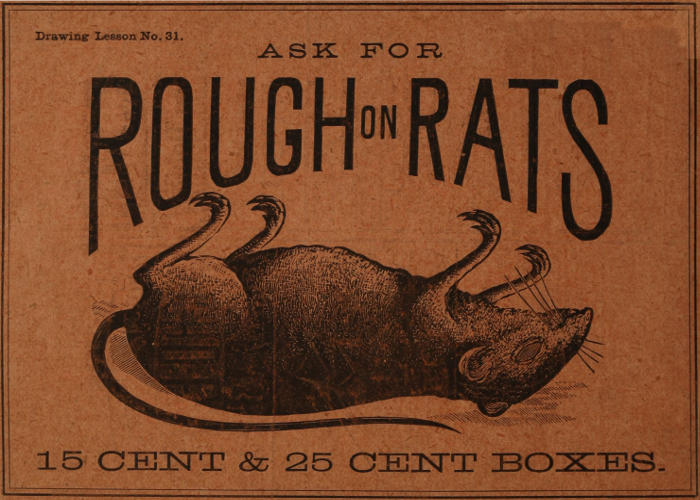
Vintage Rat Poison Ads as Art Style Reference
Rod Puppets
Making the rats
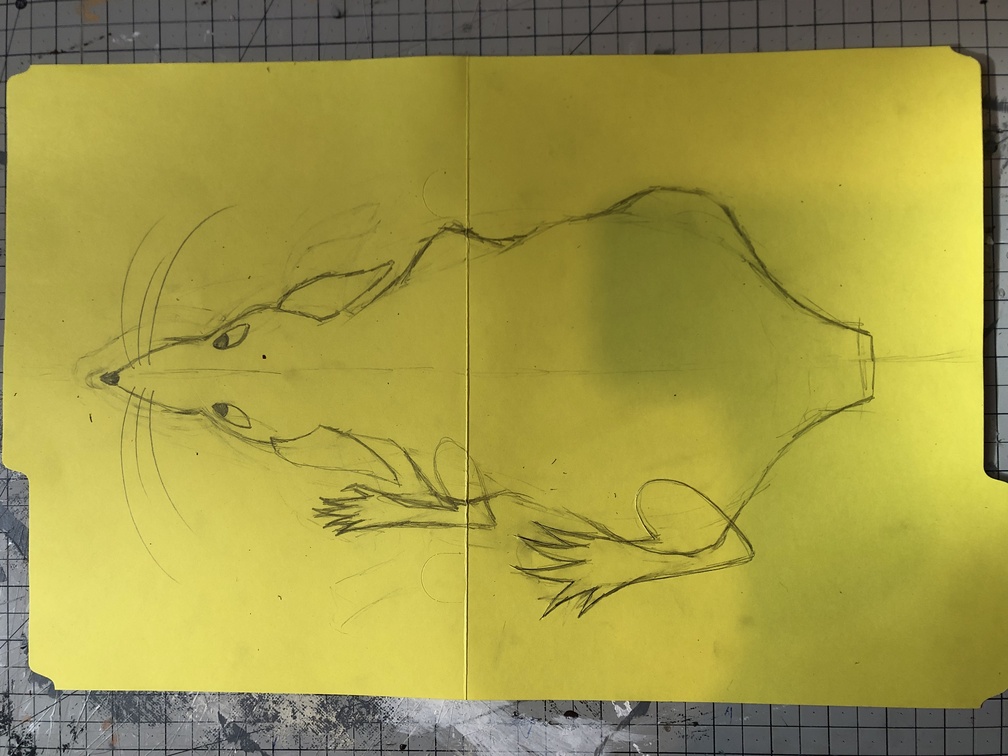
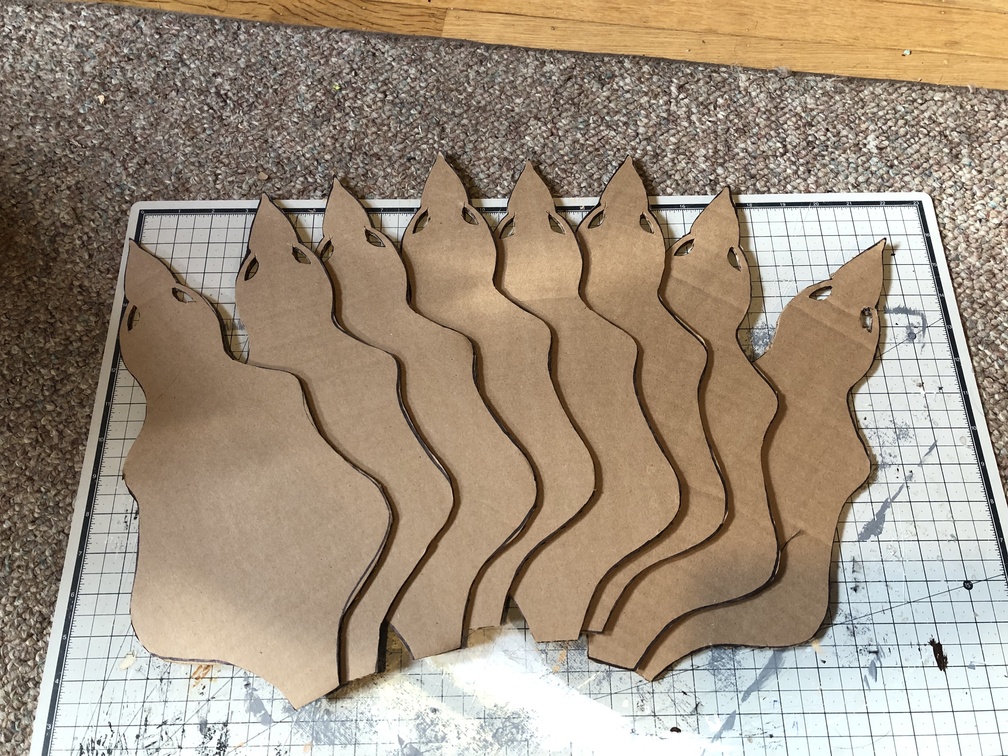
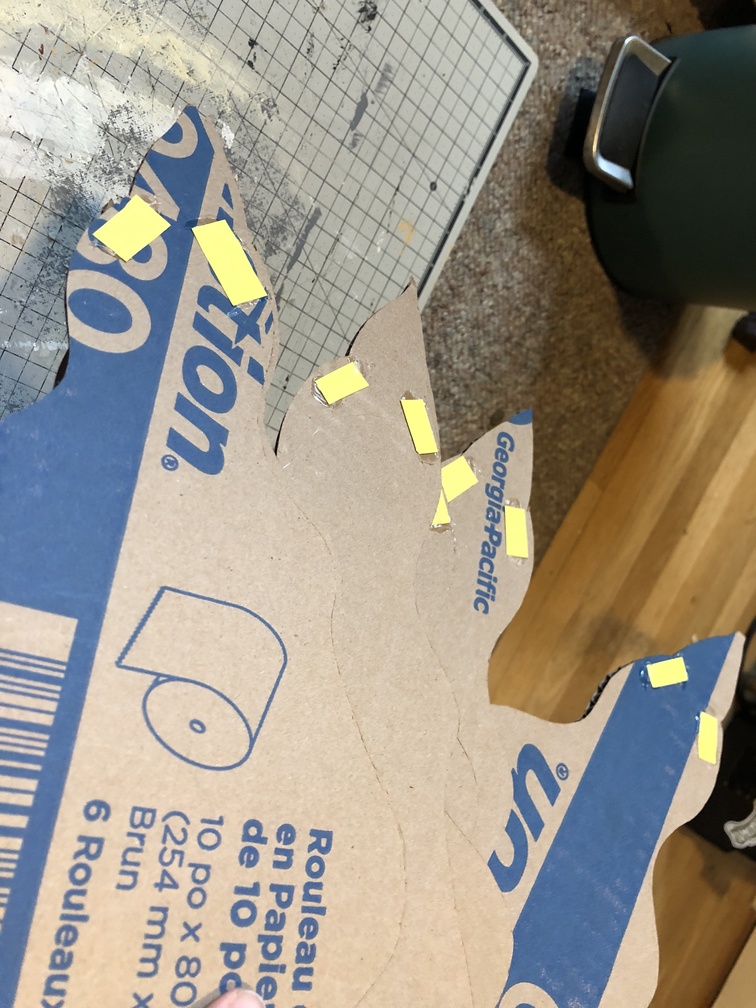
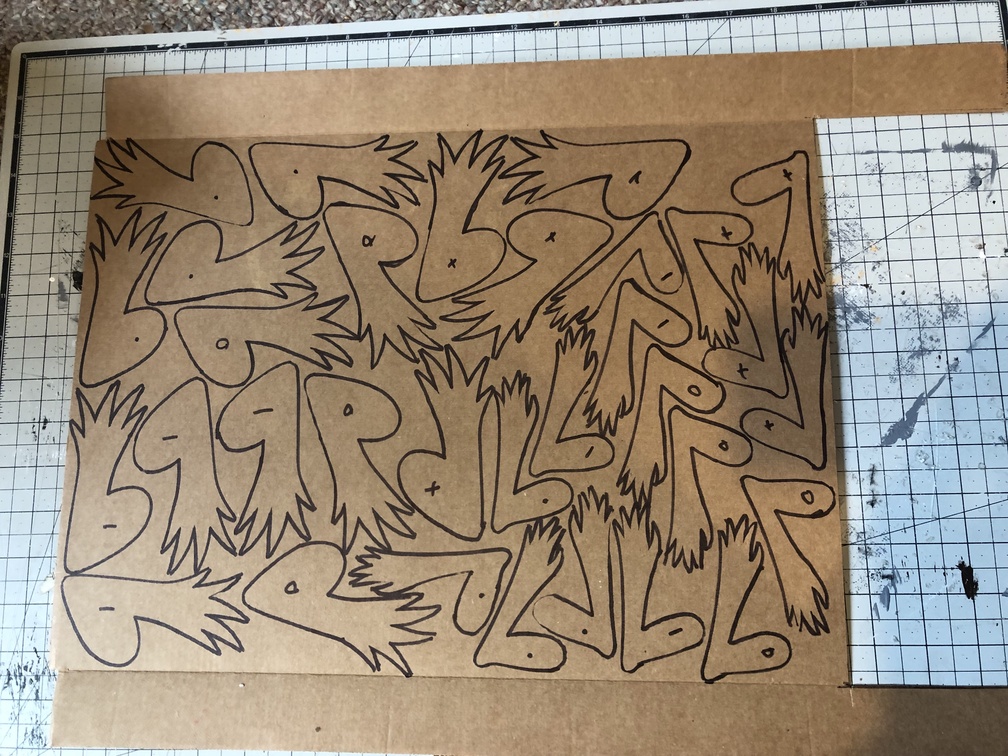
Template
I started off by making a template to cut all the rats from. The legs were cut out seperately.
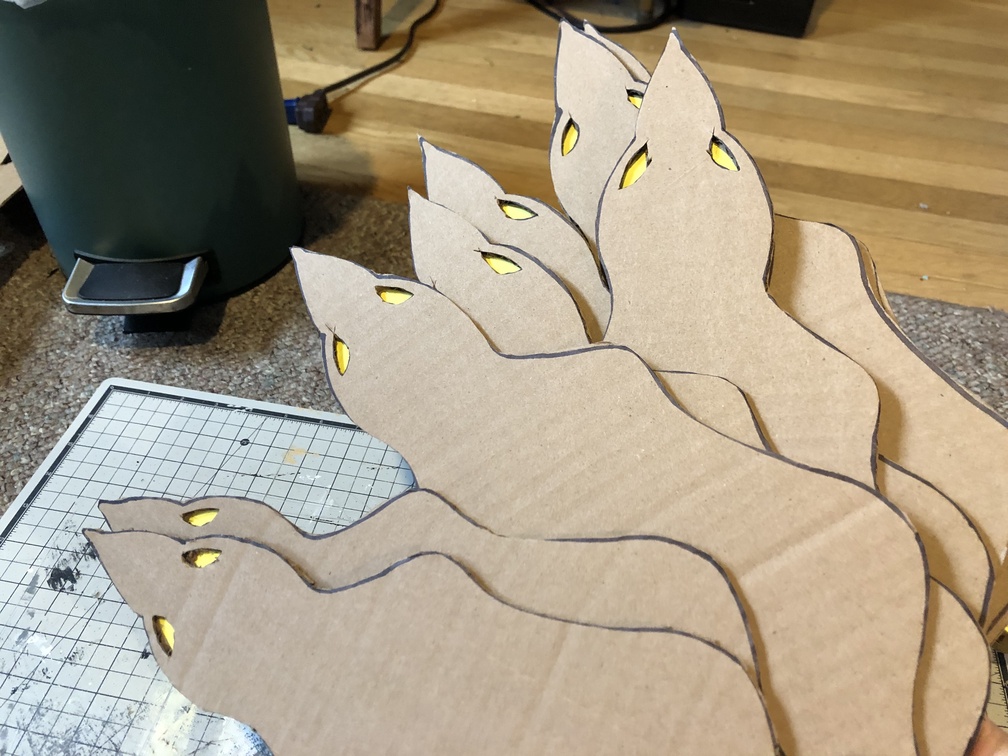
Paper eyes
Back of the eyes
Cutting the legs from thinner cardboard
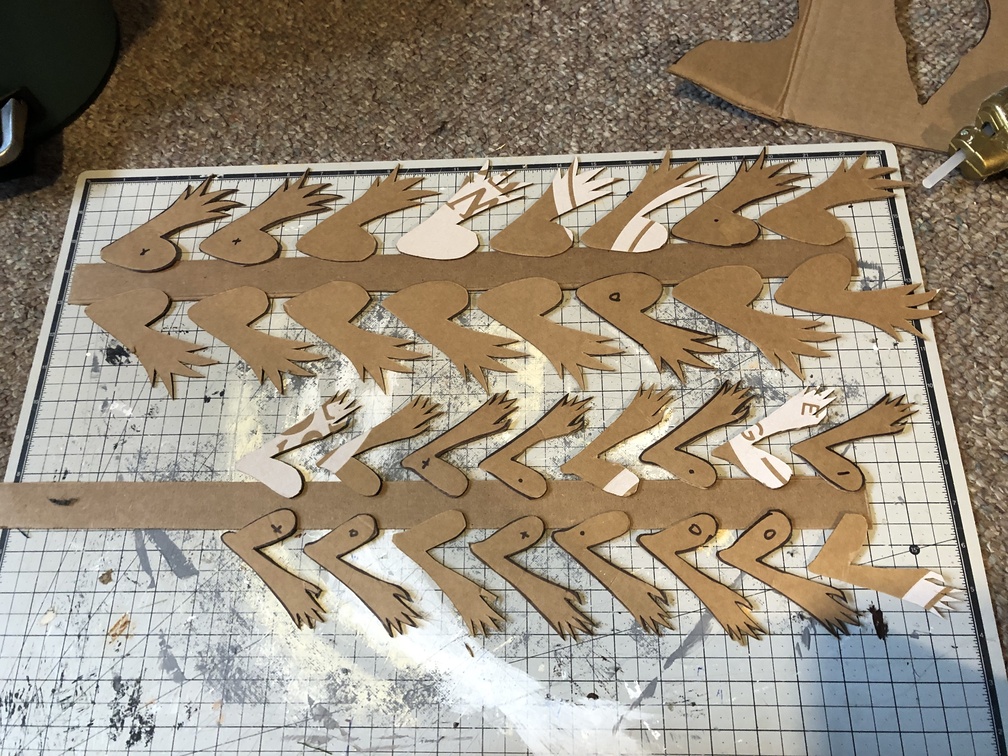
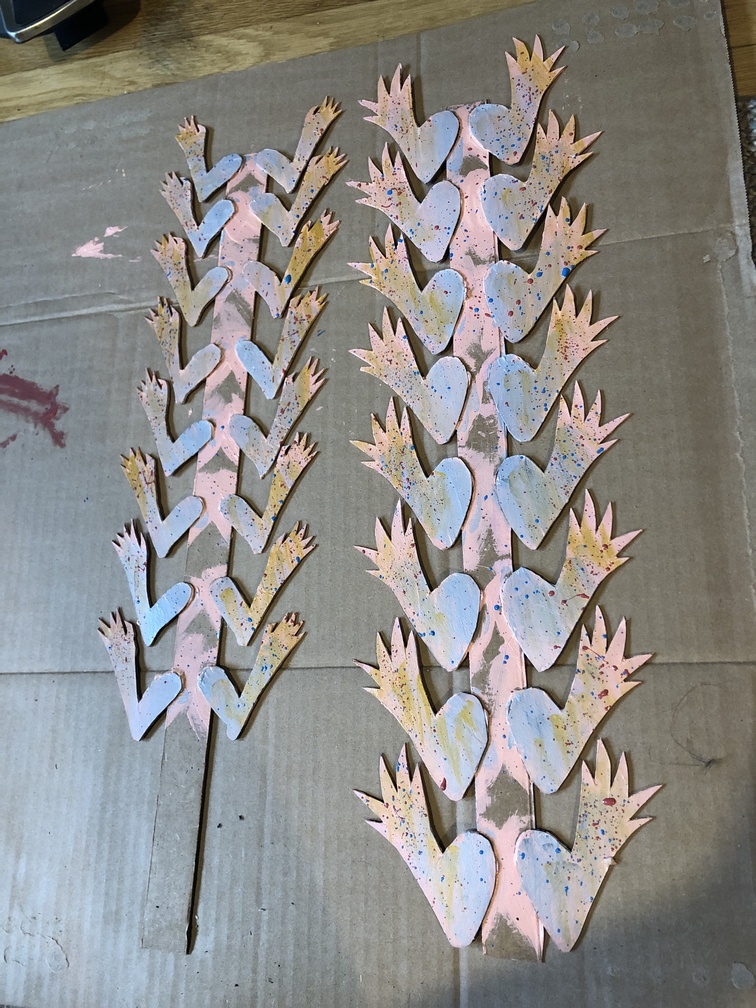
Legs glued together for painting

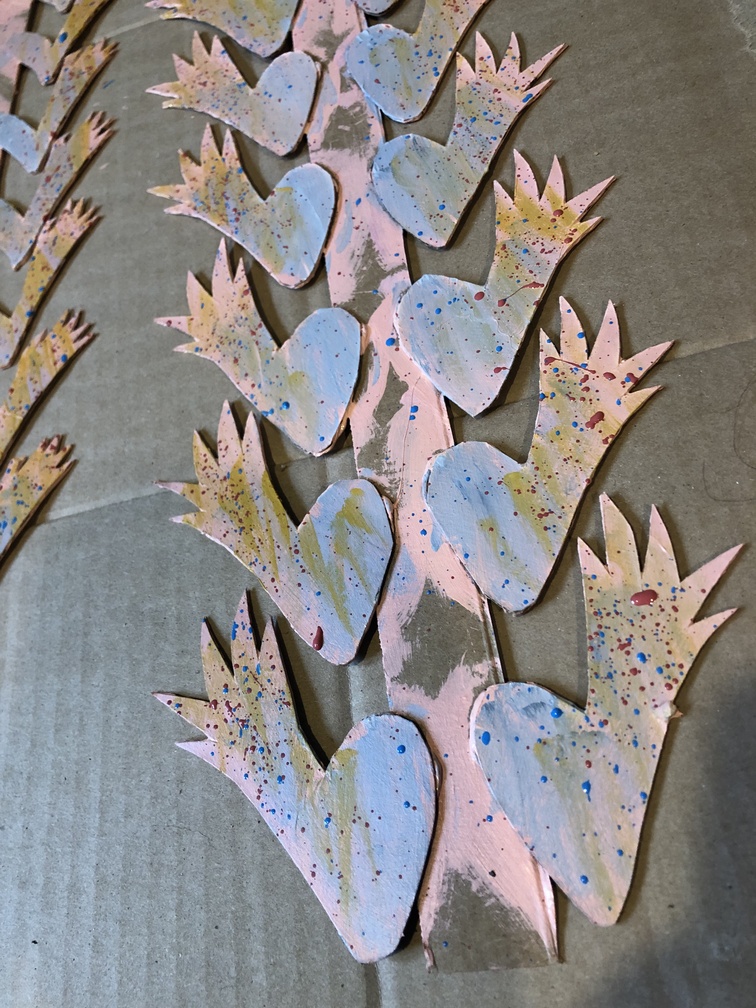
These look so fun and cursed, but they helped so much when painting the 30+ legs!
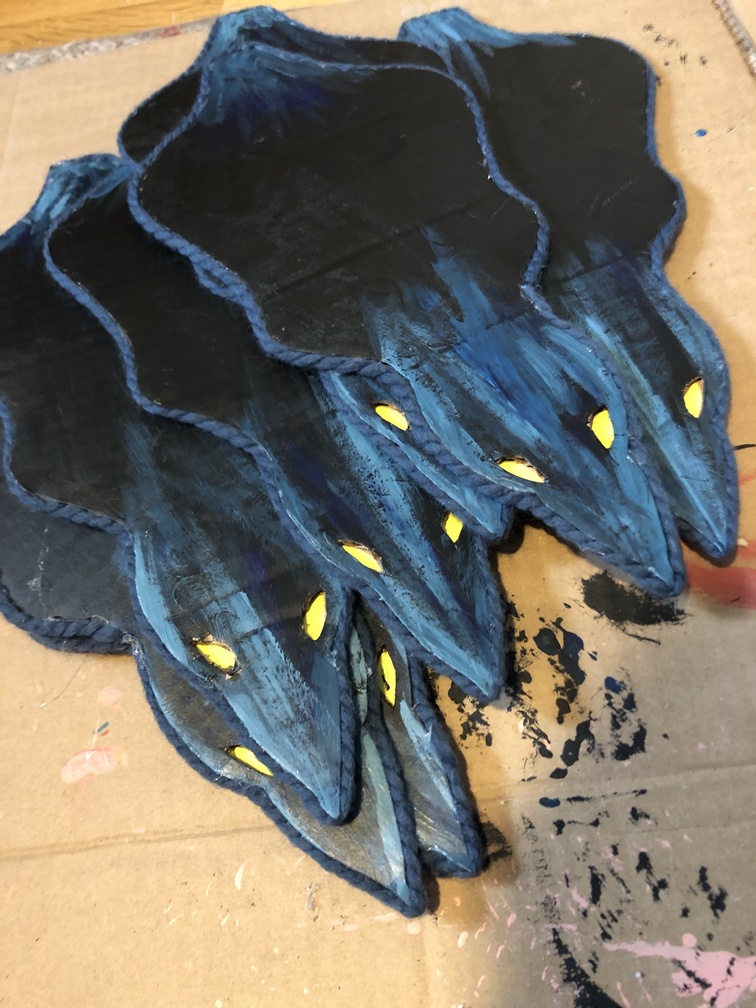
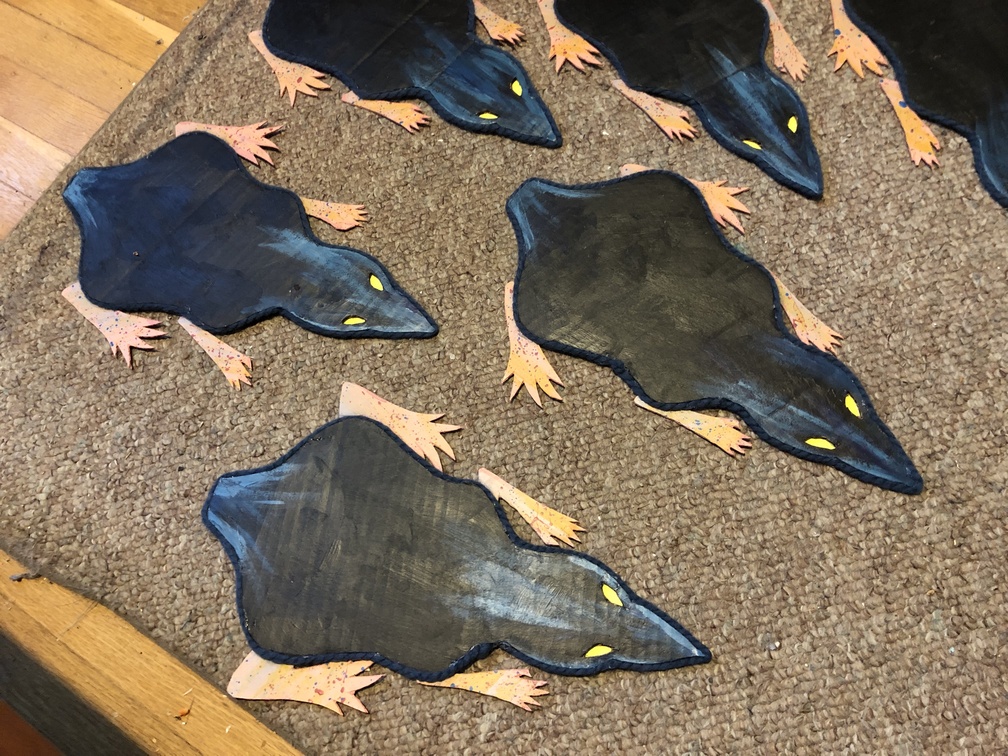
I planned on covering the bodies withfabric and yarn, but still wanted there to be detail where the carboard would show through. So the rats got a couple coats of paint with some blue highlights.
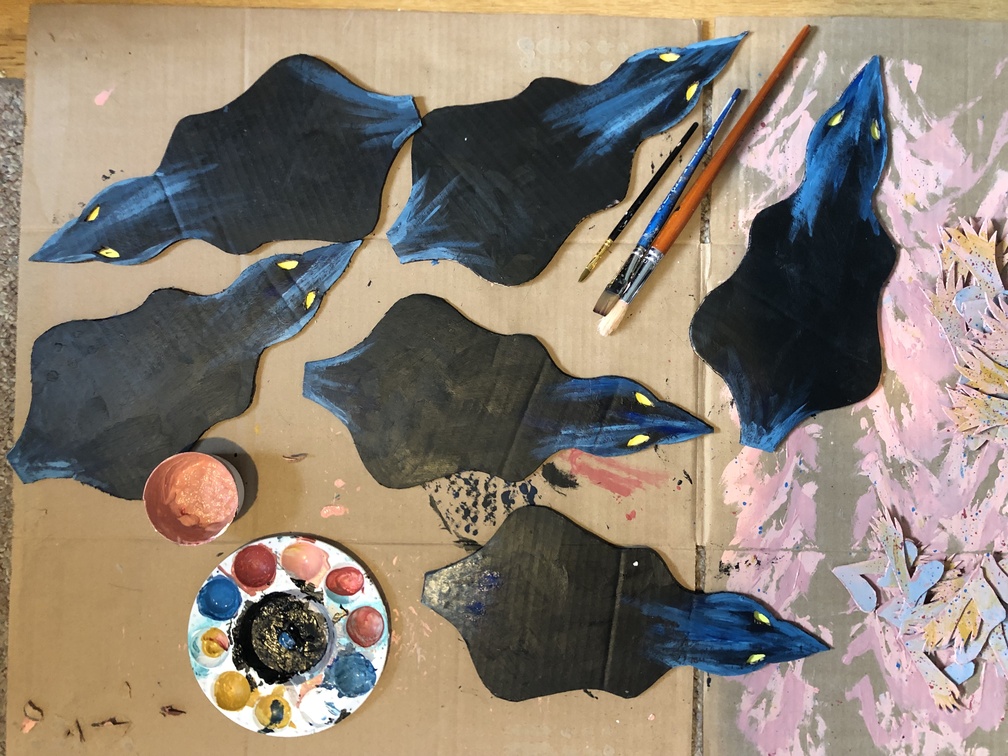
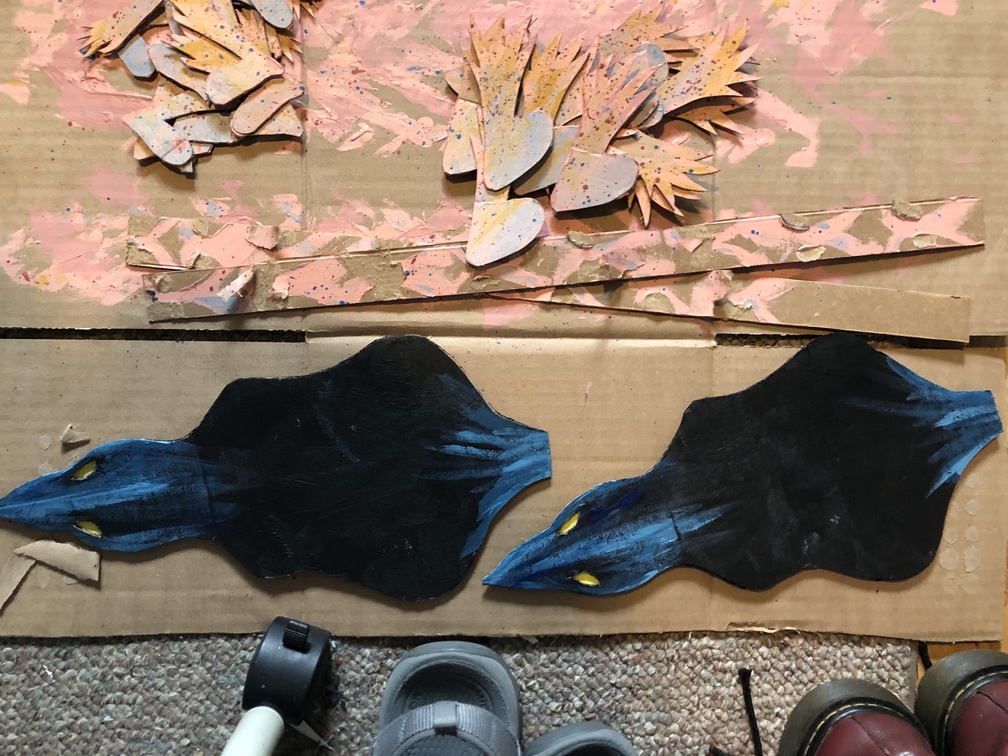
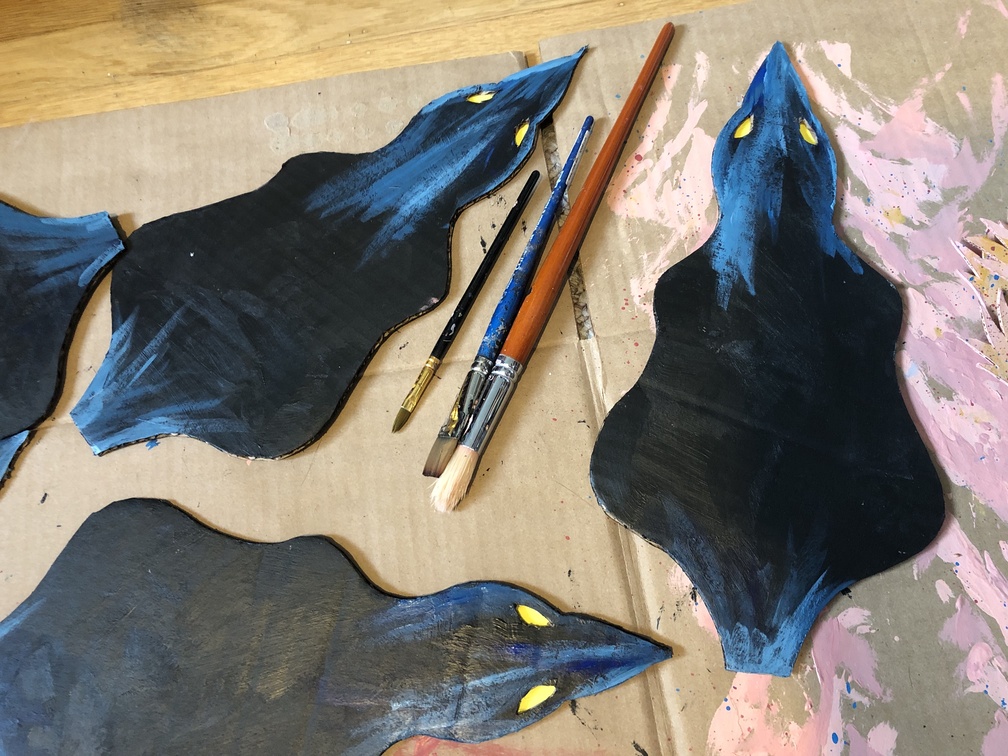

I always love adding many layers of texture and color to my puppets. Even if the audience can't pick out the individual patterns, you register the added detail and it makes everything feel much more real. The legs started out with pink, then got a dry brush layer of tan and grey, and I finished them off with a splatter paint of red and blue.
One fun side-effect of the eyes being thin cardstock - light shines through! I don't have any specific plans to use this right now, but it's a fun feature to have.
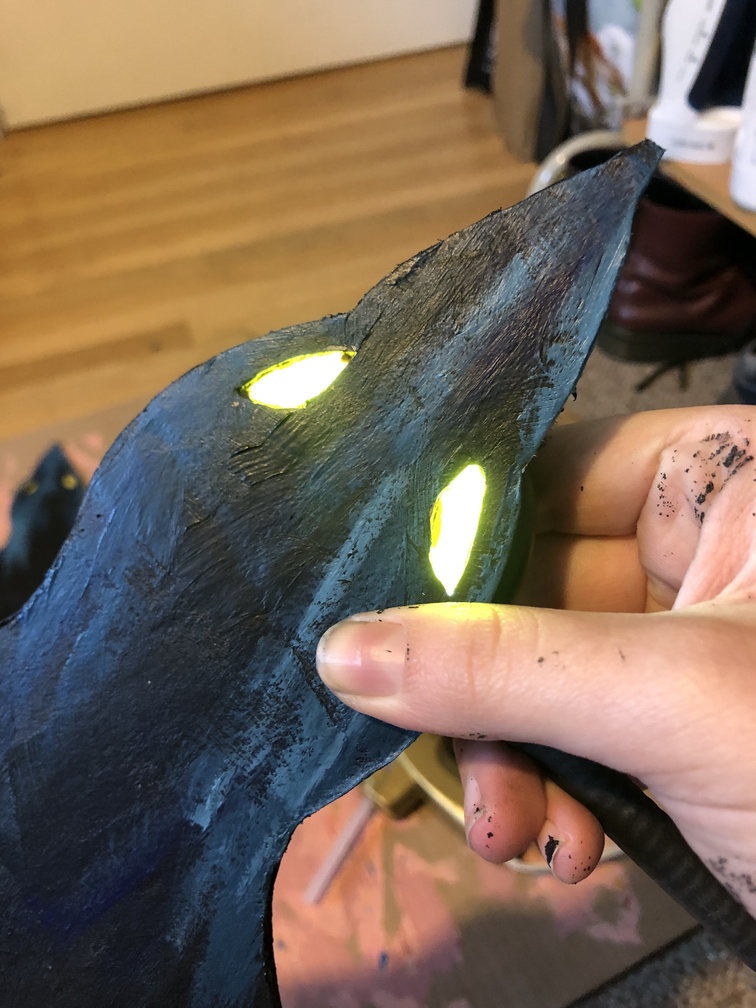
Holding a flashlight behind the eyes
Now it was time for assembly. I gave the rats a yarn border, which hides the unpainted cardboard edge and makes their silhouette a little softer. Each rat has their legs glued in at slightly different angles, for some variety.
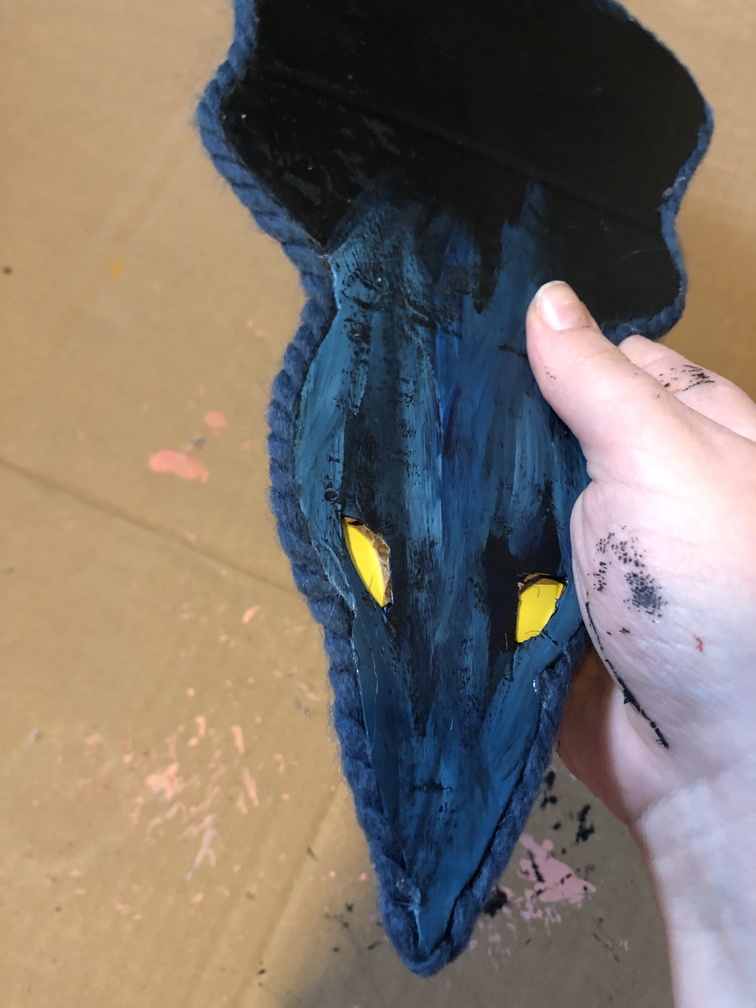
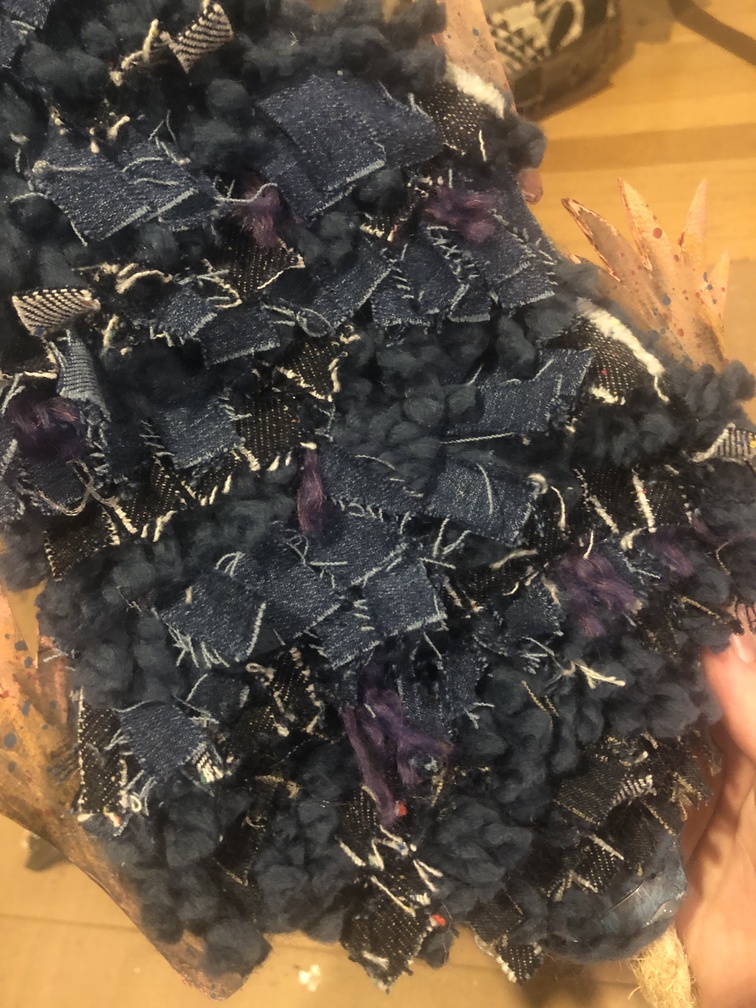
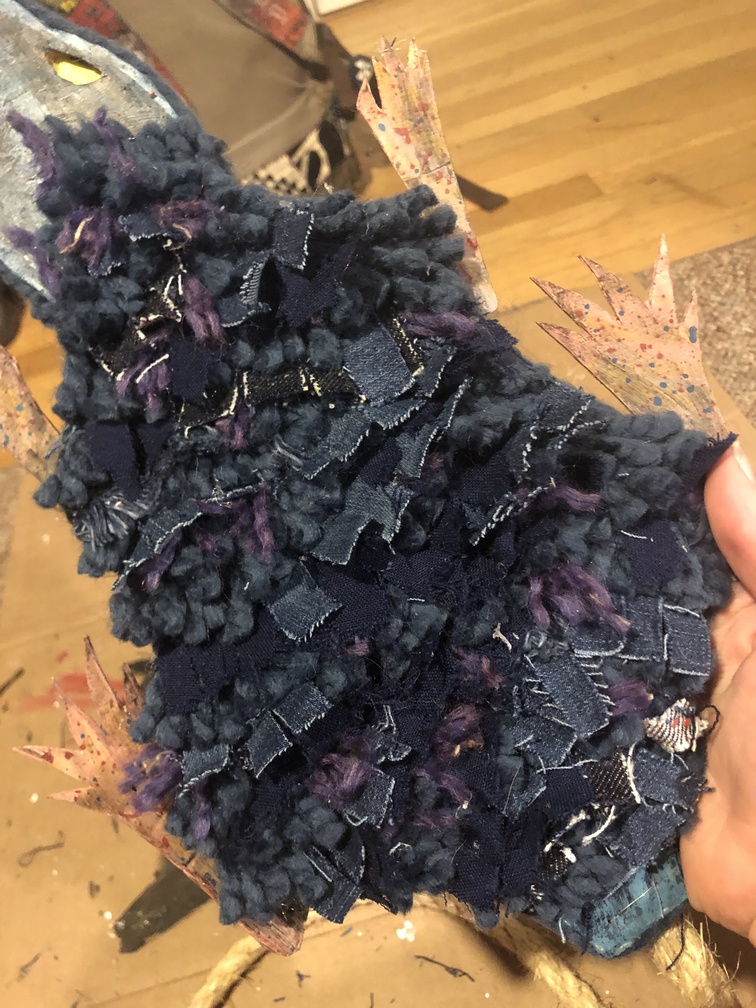
Now for my favorite part, adding scrap fabric "fur"! This is a tchnique and look that I 've been toying with a lot recently, I really love the layering of scrap fabrics and yarns of different textures and colors. Similarly with the paint job, the varriation blends together and doesn't look too busy, but it pulls your eye into it. The fluffy texture will also make them more life-like, maybe even a little cuddly.
Working with three different yarns and at least six colors of fabric, each rat has a slightly different palette only visible if you look really closely.
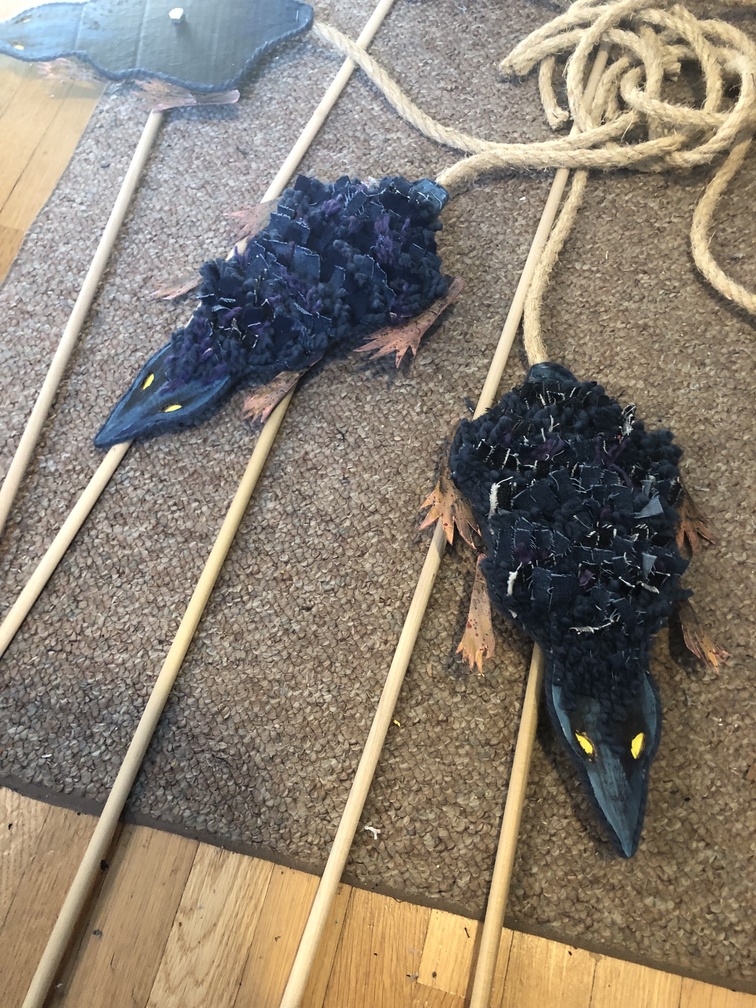
The tails were attached with wire, partically as a temporary fix as I tested how they would look once all arranged together. I knew that the tails would need to be removeable one way or another - with my plan originally being to cut them off and replace them after each show.
Rat stand
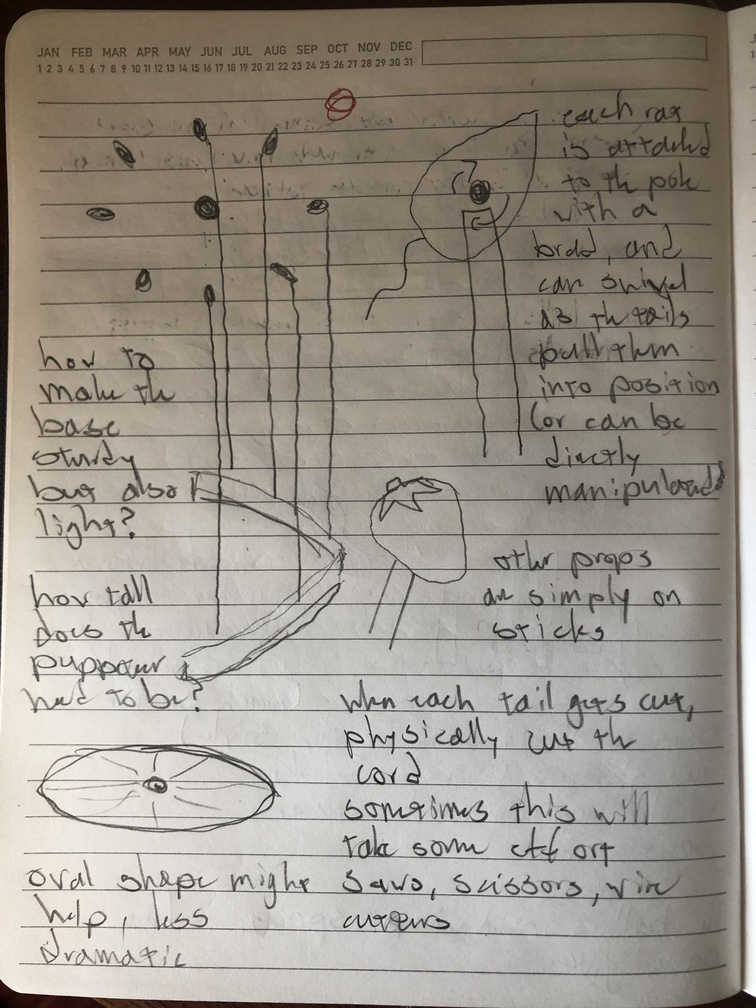
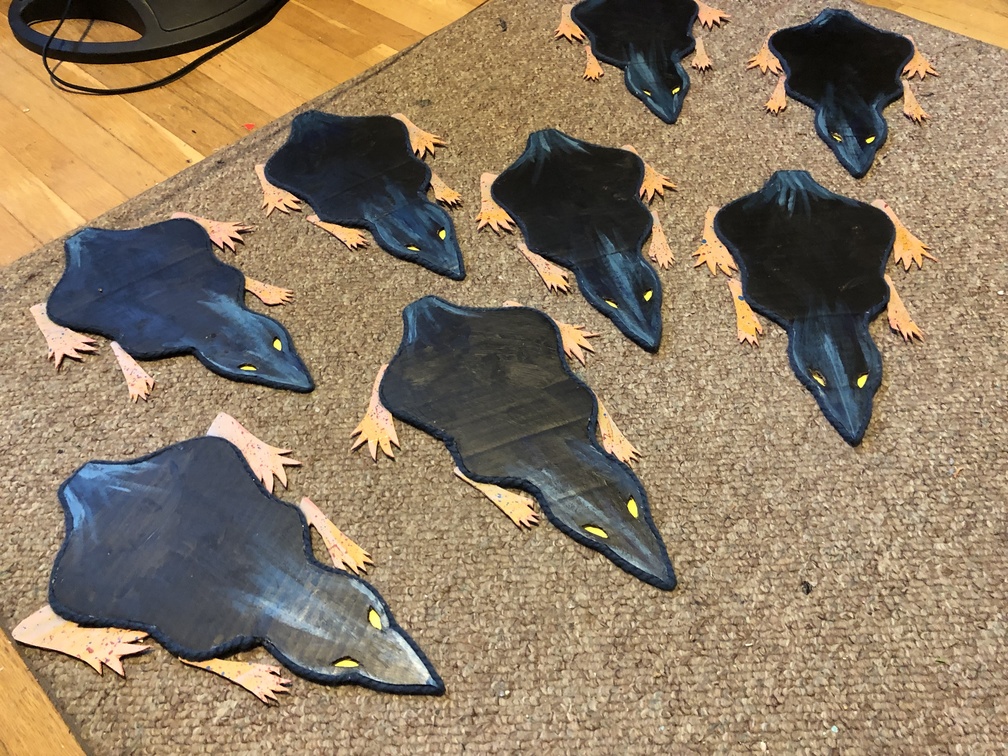
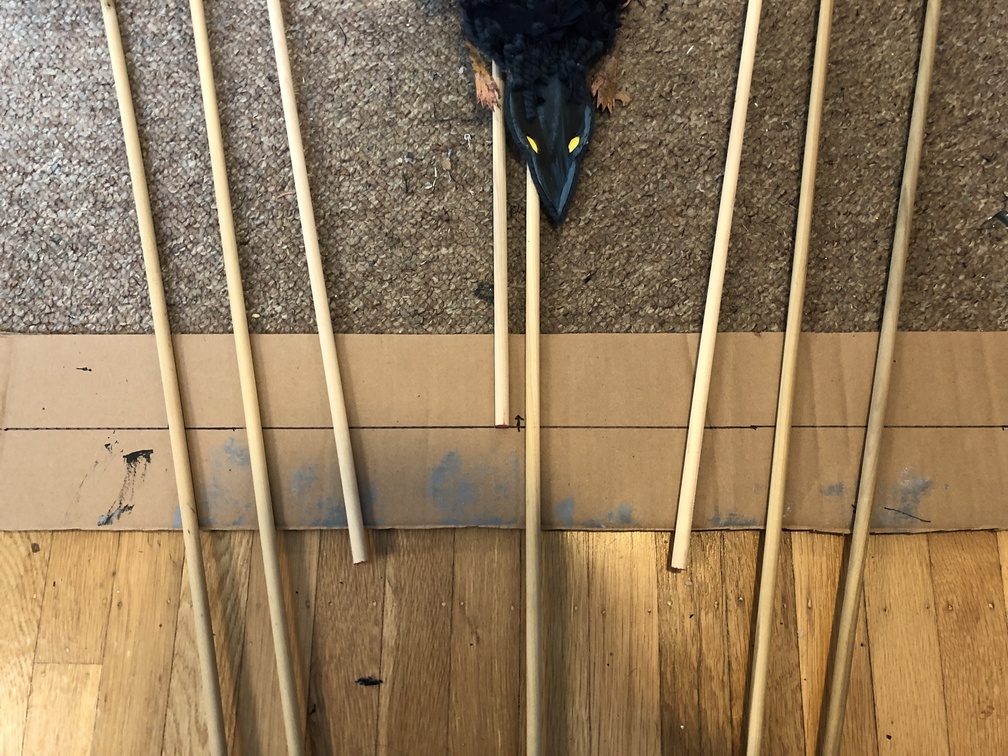
Now it's time for the frame. Thing that will,you know, actually make them look like a rat king. I had this very distinct vision in my head of all eight rats spaced out evenly around a center knot, and each would be on its own pole that could be picked up and shaken around. After attaching each rat to their poles, I did a few layout tests of how this would look.
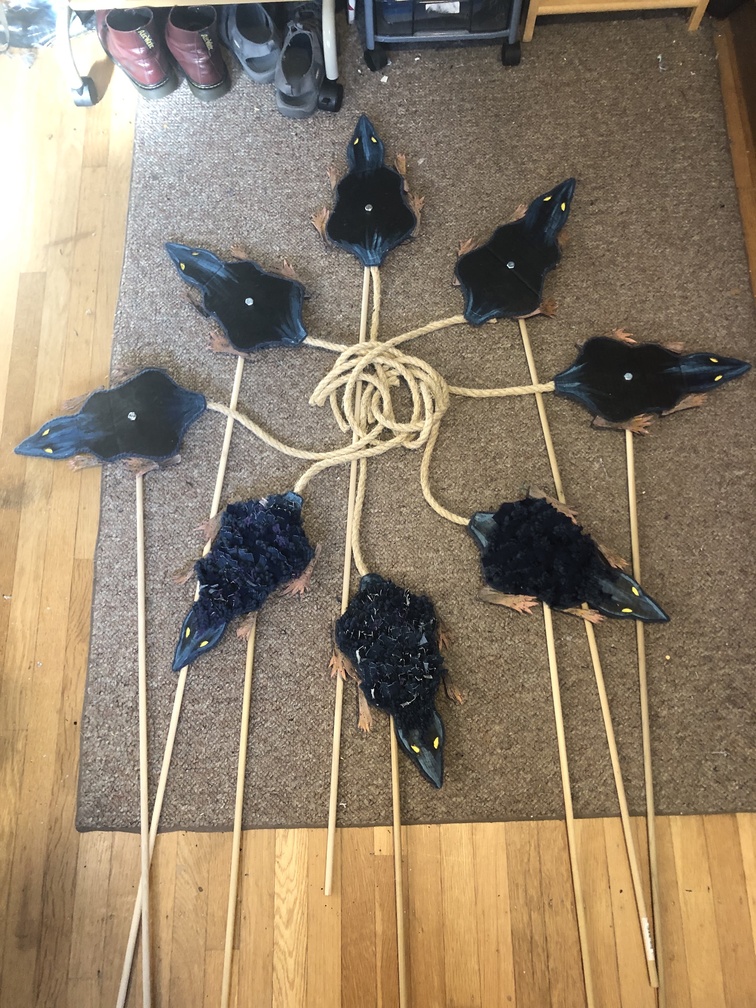
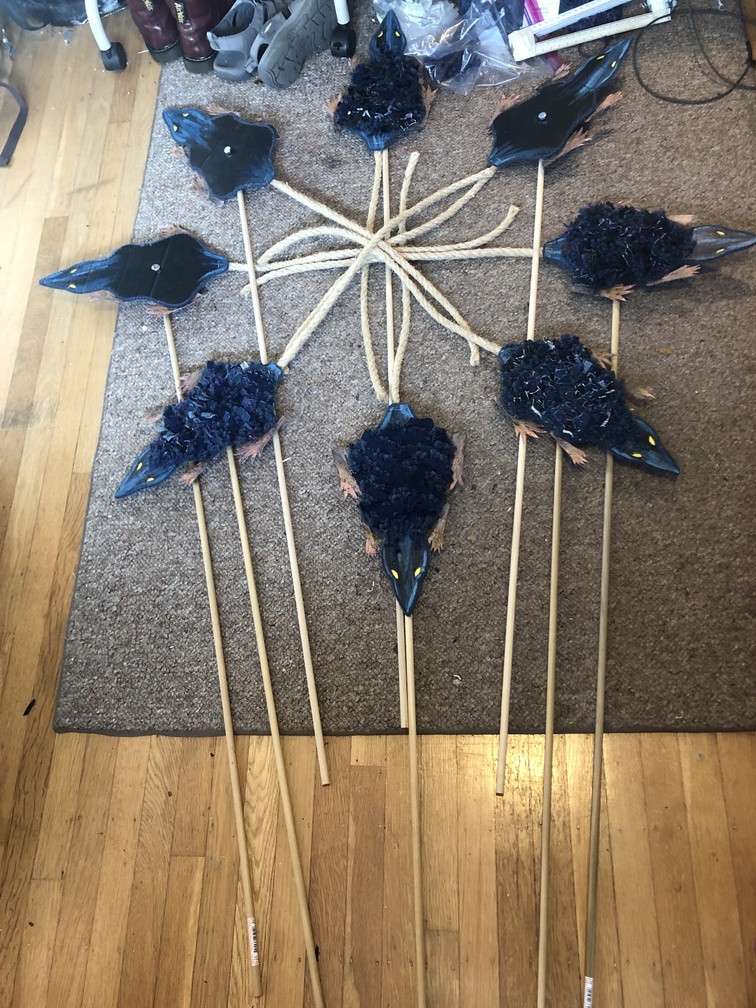
These tests really made me see how difficult it would be to find a balance between how far apart I wanted the rats to be, and how far I could physically get them while restrained by the lengths of the poles. I also realized I would have to cut most of these down. I decided to make them two feet apart.
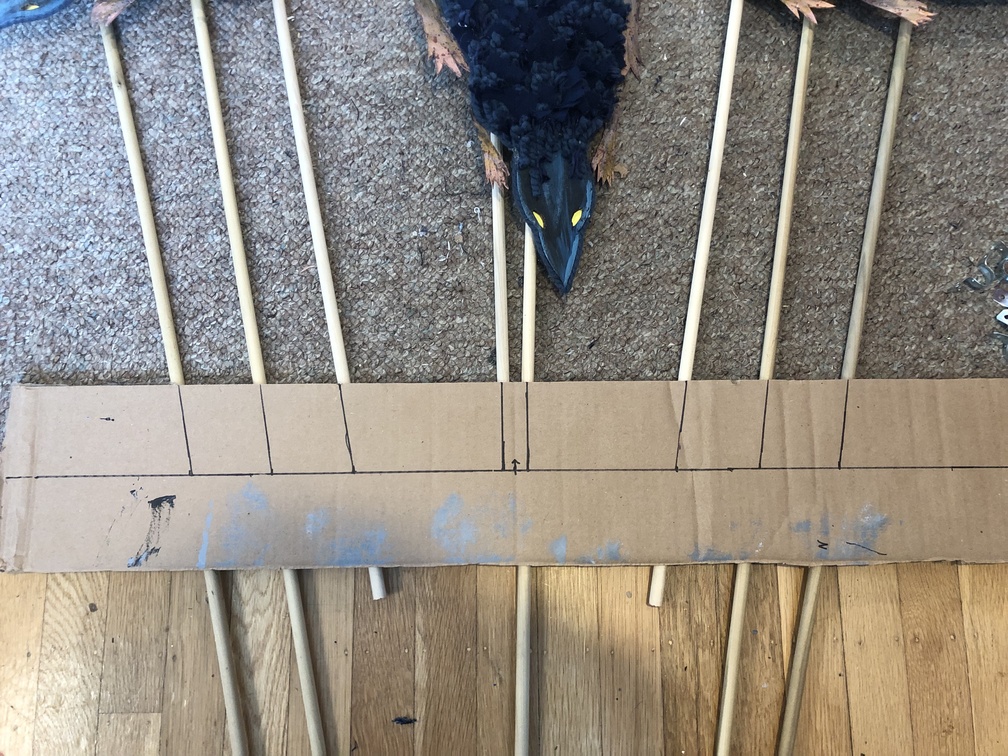
By laying a piece of cardboard where I wanted the stand to be, I was able to mark the angles and loccations of each pole. I used these rough marks to determine a constant angle and distance from the center, then re-positioned the poles so they all lined up in order to check my work. These marks were then transfered over to the piece of wood used as the stand.
And this is where this leg of the journey ends. I didn't know where I wanted to go with the script, and visualizing how the rats would move in this formation became difficult. I had hit a road block, and set the rats aside for the time being.
Hand Puppets
Reset. Start over. New plan.
Cardboard Bases
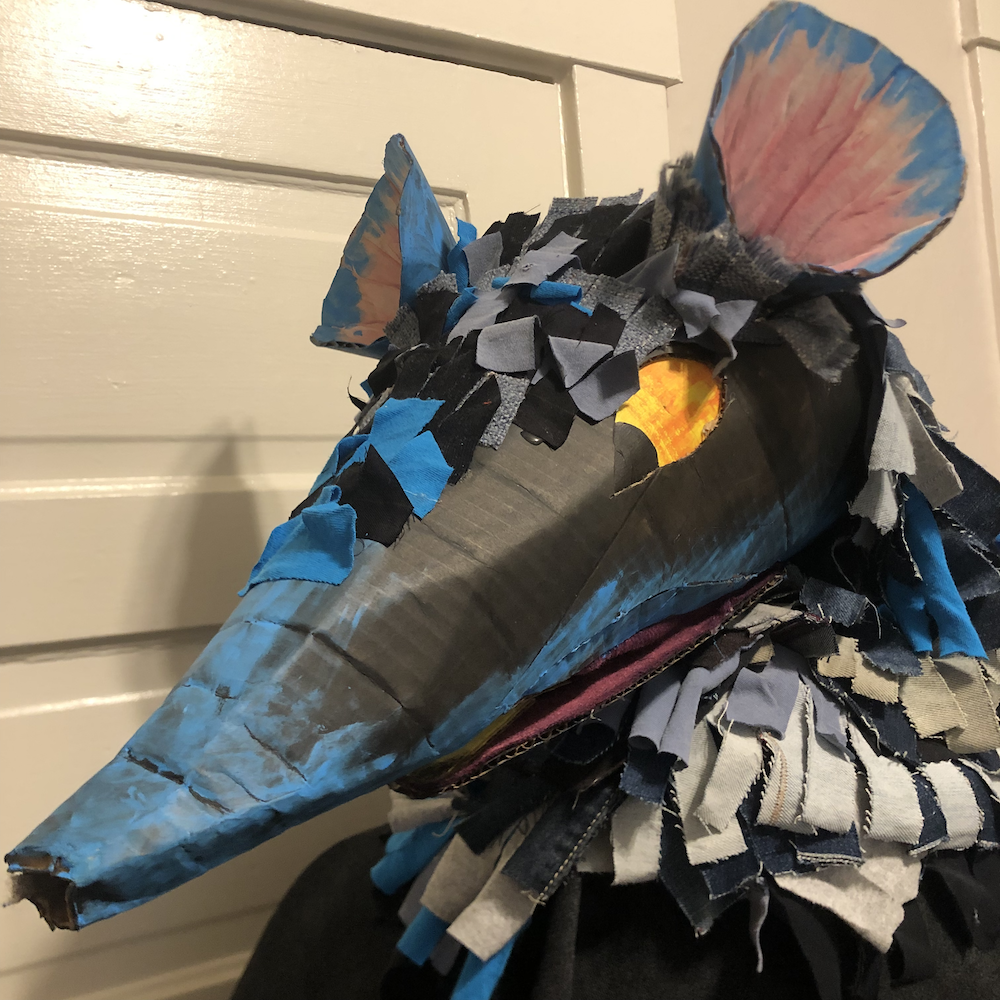
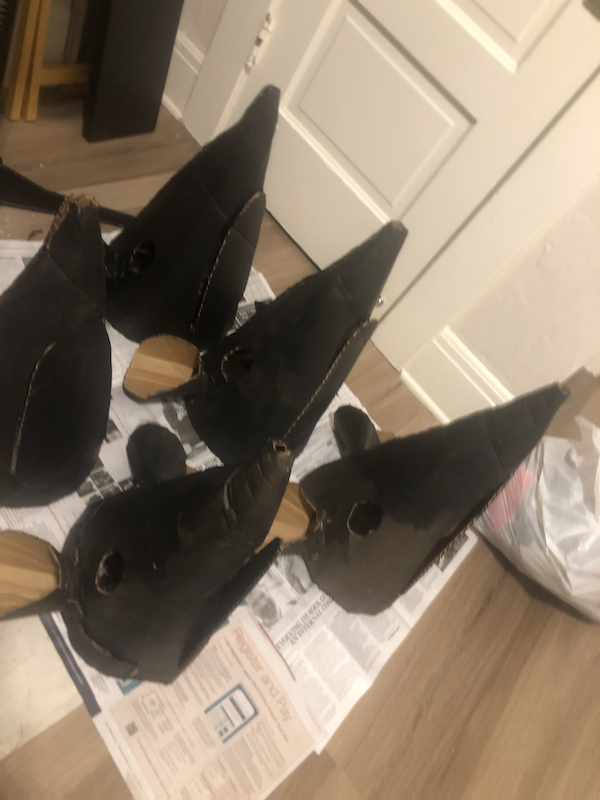
One again using the cone style of construction like my General D. mask, I started off measuring my cardboard to make the cones the maxium size I could fit with my materials. After making the first demo, I measured the distance from each facial feature to copy onto subsequent puppets. I also made a single ear, including tabs to make attachment easier, and traced it for the other 9 ears. Making notes and patterns allowed me to speed through making all 9 heads in one day.
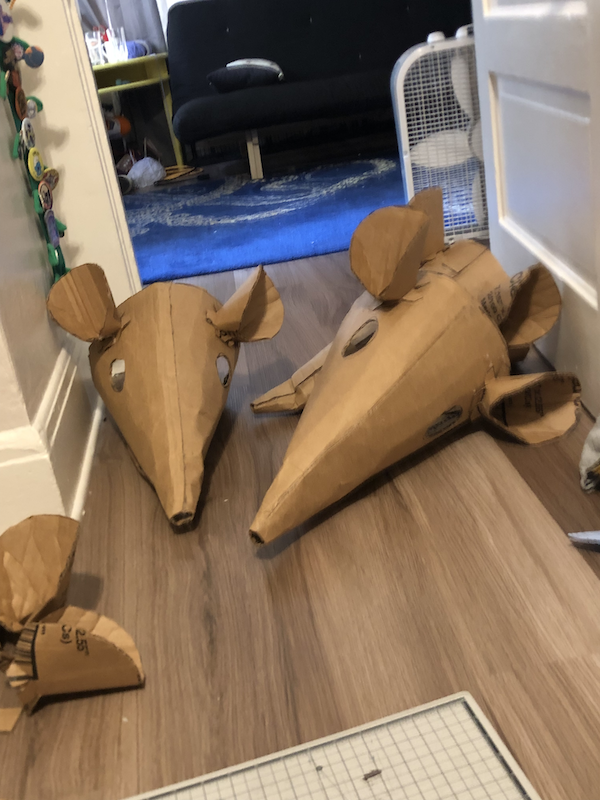
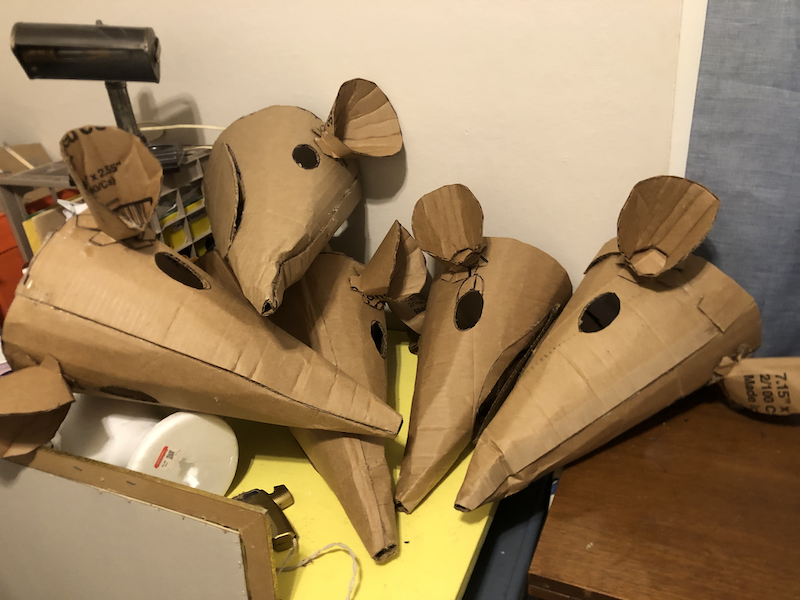
They kinds look like skulls without the eyes in there don't they?
First coat of paint was watered-down black wash. Watered-down because I was low on paint and it's dark enough to cover most of the printing on the cardboard anyway.

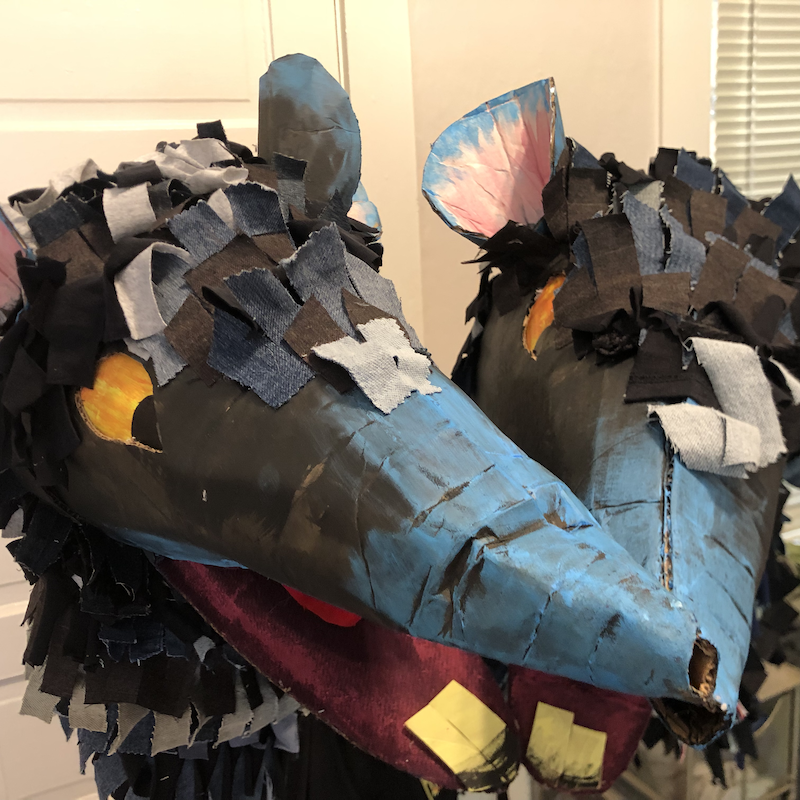
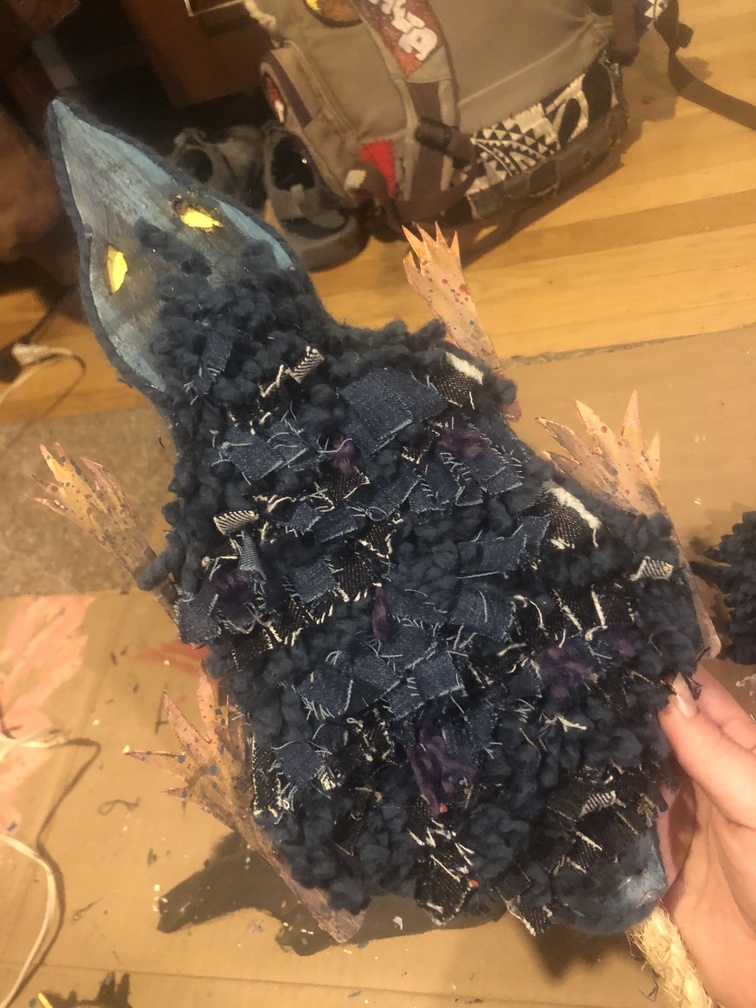
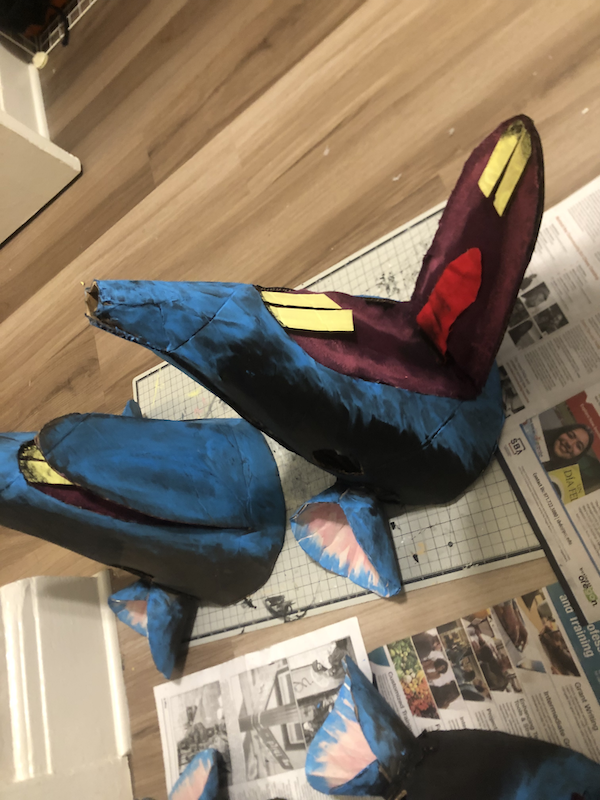
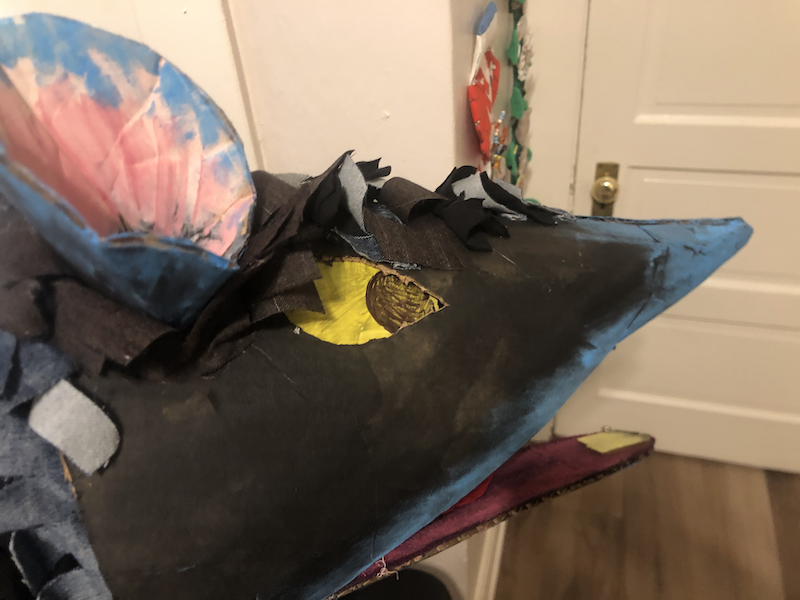
Blue! I love blue! Most of my black animal characters will have a bit of blue in their fur, it's a little stylized touch I love that mimics the way black fur shines in the light. Black paint also doesn't catch light well onstage, usually signalling something you're not supposed to pay attention to, so the blue catches your eye. I painted with my hands to get a varried texture.
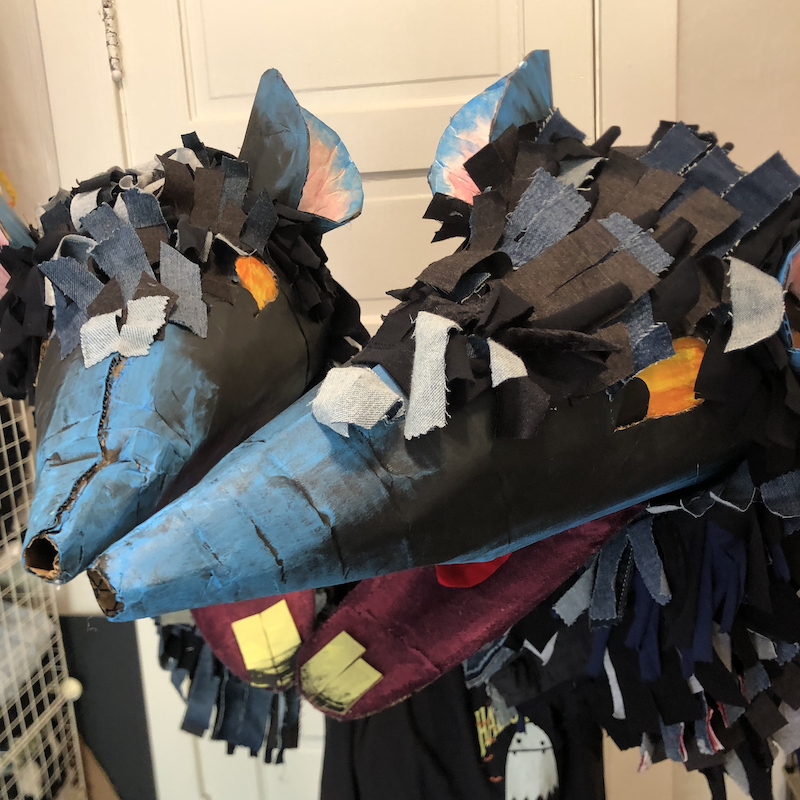
The insides of the mouths are filled with some scrap red fabric and cardboard teeth made of scraps I painted beforehand. I would absoltely recommend painting your fabric even if it feels wrong, the gum highlights and shadows do a lot to make it feel dynamic and grungy.
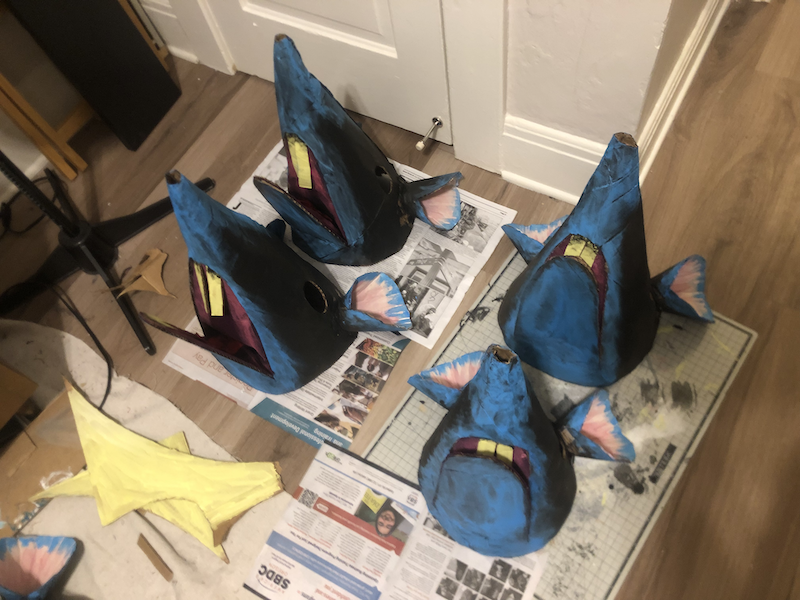
eye test with no pupil
eye test with pupil
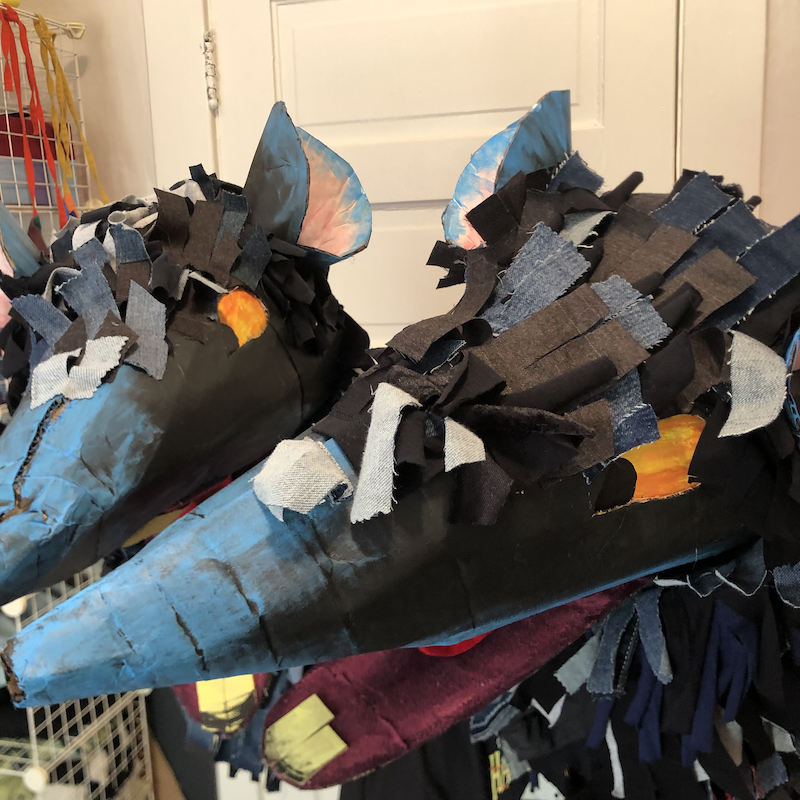
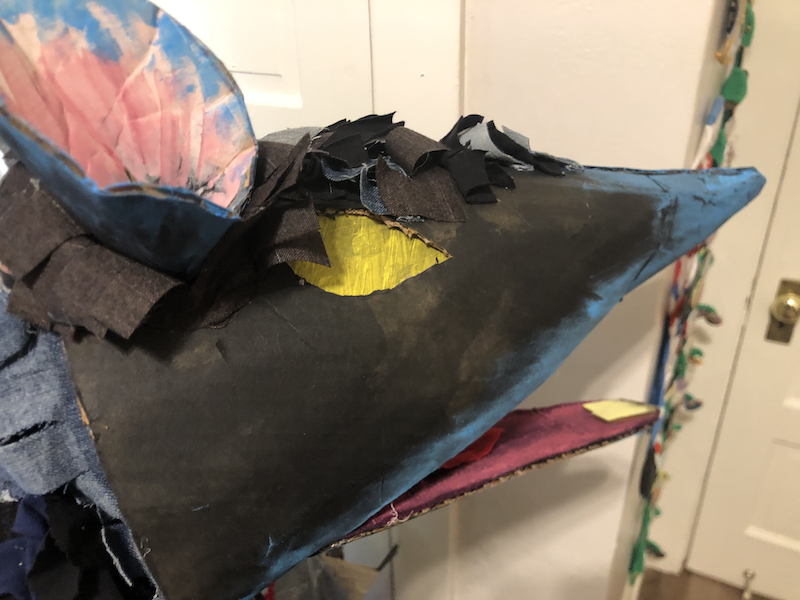
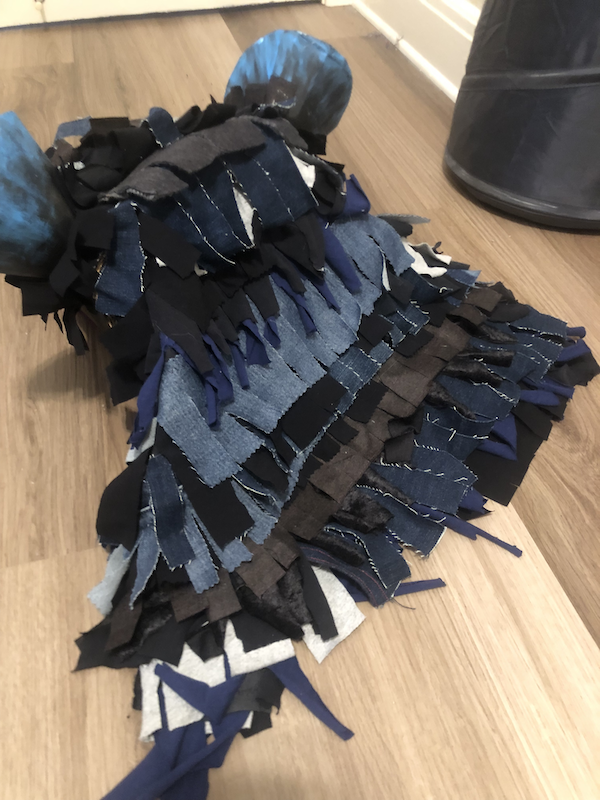
Adding "Fur"
My goal is always to use up scraps. I have so many scraps that need using up. This style of fur is mainly designed for that purpose!
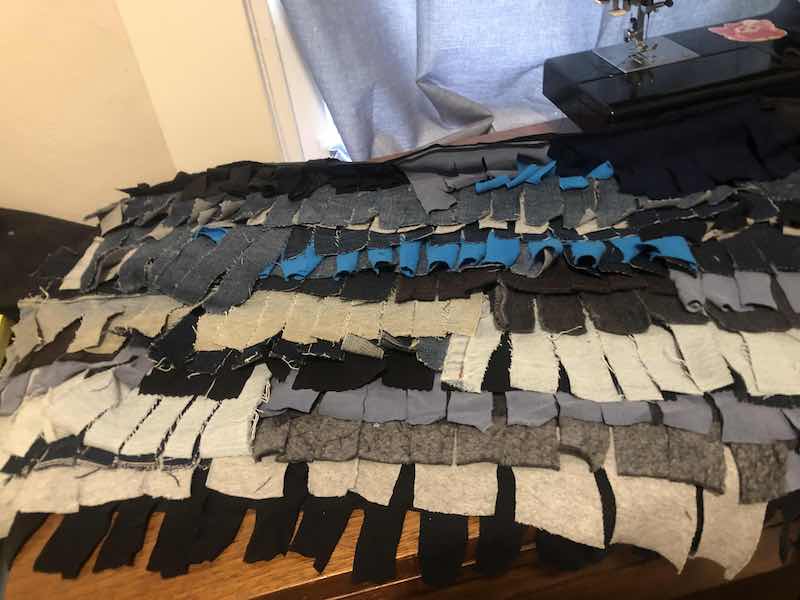
I start by picking fabric in a range of styles and a couple specific colors. In this case, I also had a handful of t-shirt scraps and jeans from past project, which were perfect for the black/blue/grey palette. Cut the fabric into strips between 2-4 inches, and then cut slits into that fabric every inch wide or so. Then layer them on your base fabric, and sew, sew, sew. The effect is a little like a piñata, gives great secondary movement, and lets you use up all thos little bits of scraps that have been hanging around.

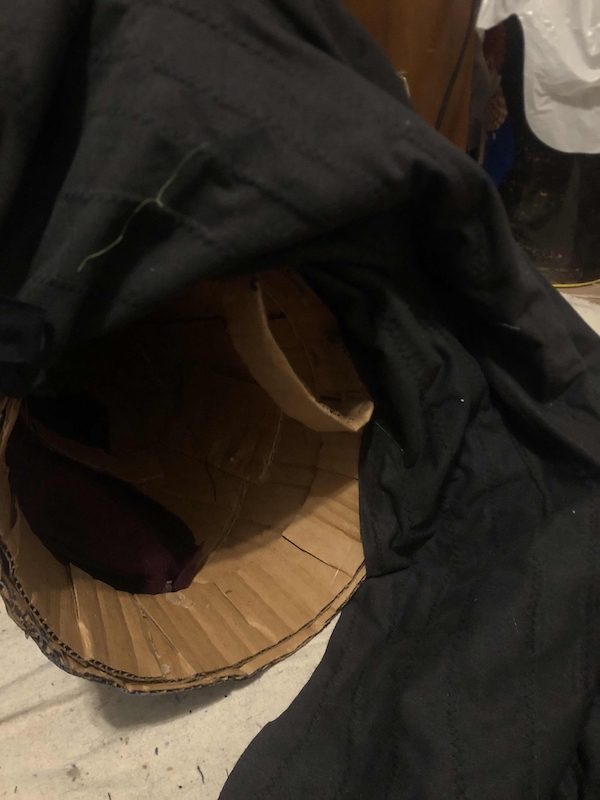
Each cowl is attached to the back of the head along the inside. I had wanted to staple these on to save glue, but my staplers were either too weak or broken, so I ended up using hot glue anyway. Put a good stapler on my shopping list.
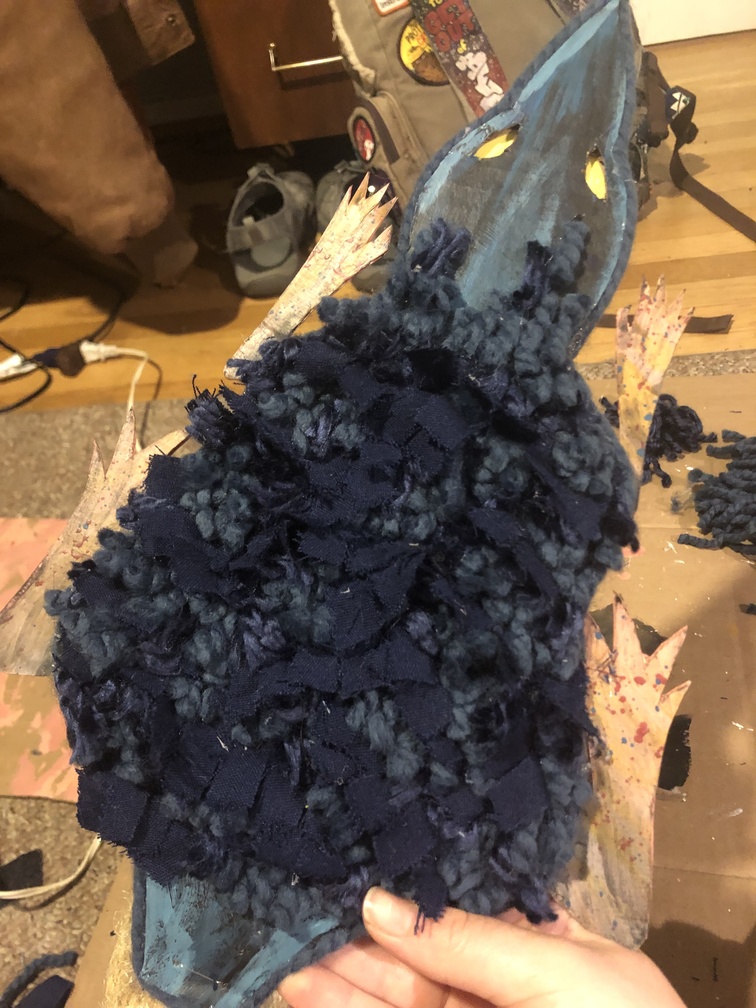
carefully attaching fur
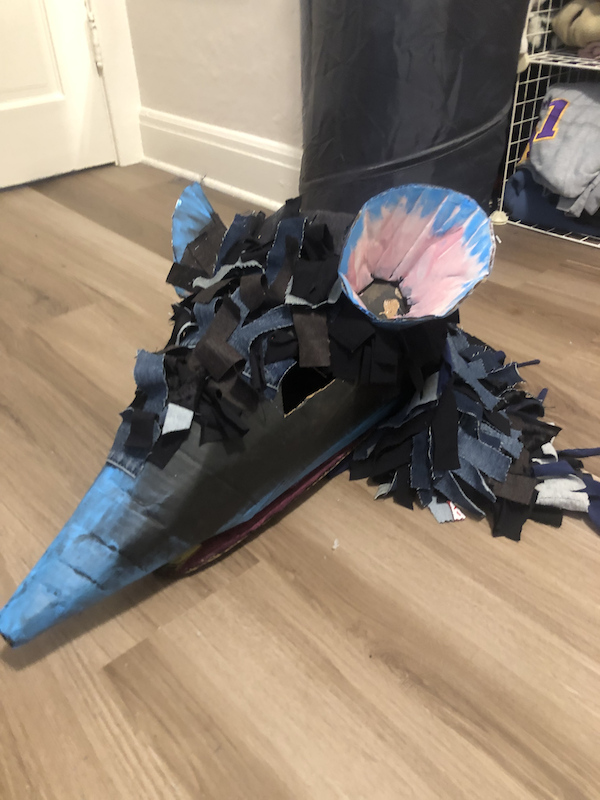
Next, using more of the smaller strips, continue the overlapping fur pattern down the length of the nose.
Almost done, they need whiskers! These whiskers are made from two strands of yarn and one strand of beading wire (light blue, it's what I had) braided together into lengths between 8" and 12".

Drill a hole through each side of the nose to string each whisker through, creating two identical whiskers on either side. These are great because the wire allows them to keep their structure, whil the yarn makes them bulkier and able to been seen from afar.
Side note, I think my phone camera quality is finally going downhill and inconsistent enough to be obnoxious.
Tails
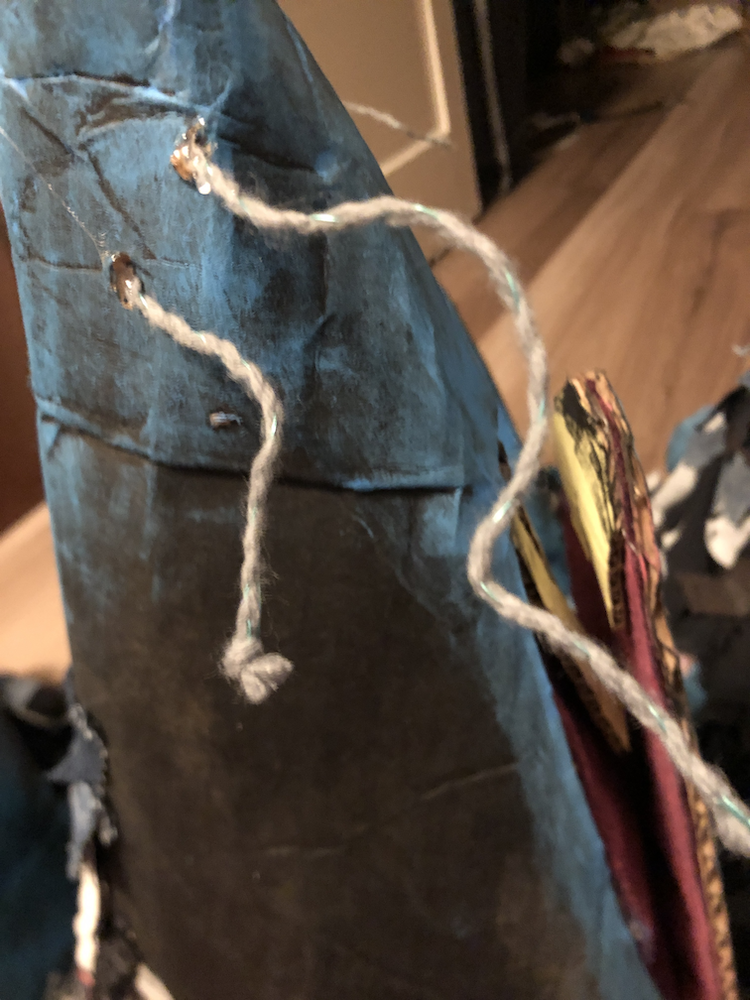
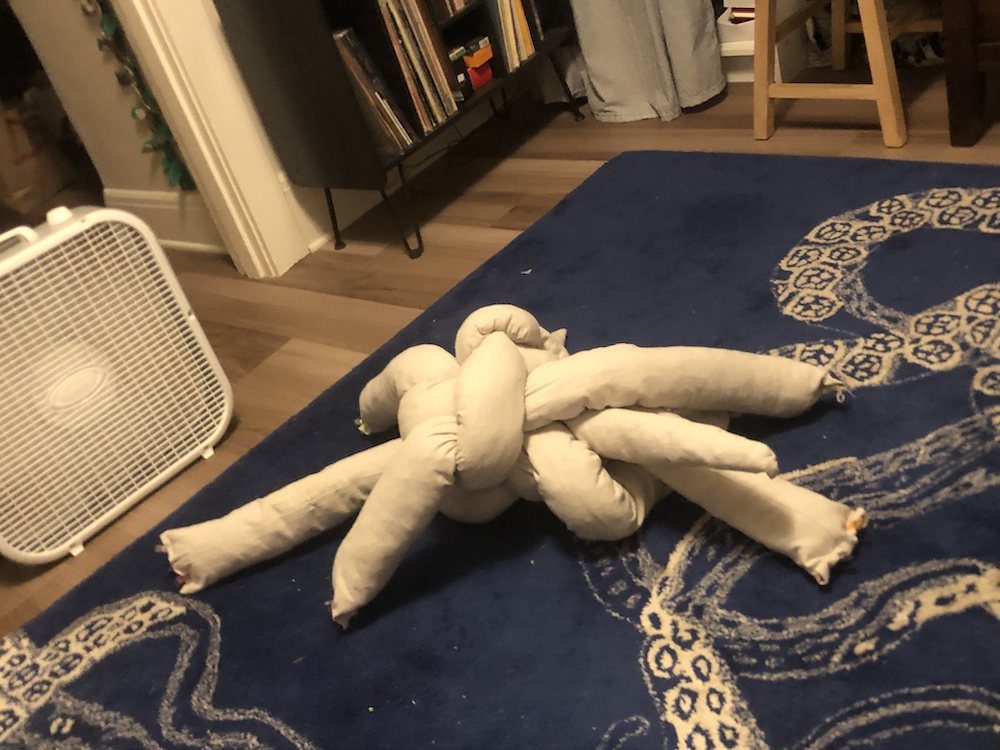
The most important part! The rat king's tails are made from canvas, cut into 12" by 5' strips and sewn into tubes. To continue not spending money on this project, I stuffed all of them with scrap fabric, and even reached out to a friend to take on some of his scrap supply as well. The tails were made in two pieces, the first one which would be tied into the knot, and the outer pieces that attach via velcro. Four of the tails would work like this, one tail would be tied in the knot but be permanently cut off at the end, and the sixth would come out of the knot and would not need to be broken. I still waited to attach the end of the sith until the knot had been tied.
After stuffing all the tails, I sewed the ends of the six together in the middle, and started wrapping them around each other to form a genuine knot. I made four tail ends and stuffed them, to hand sew between the empty spaces in the knot and hide the initial connection. The endo fhte sixth tail was hend sewn on last.
To make it easier once onstage, each of the 4 tails which would need to be cut were also labelled with a hand-sewn patch. The dirtying would cover up some of the visibility for the audience.
Tail 6 got clips and loops on the far end. It's a secret tool that will help us later.
Now for the fun part, weathering! Time to make these things look bloody and gross. Using watered-down paint and standing in the muddy alley of our building, we covered the tails in splatters of watered-down red, brown, yellow, black, and green. The variation in color is the most important thing, expecially for realism and to get a gut gross-out reaction from an audience. You want green and yellow in there to break up the color.
With watered-down paint especially, I want to make sure everything is fully dry. So I sat outside on the stoop of my apartments for an hour or so. I would love to know what my neighbors think of me.

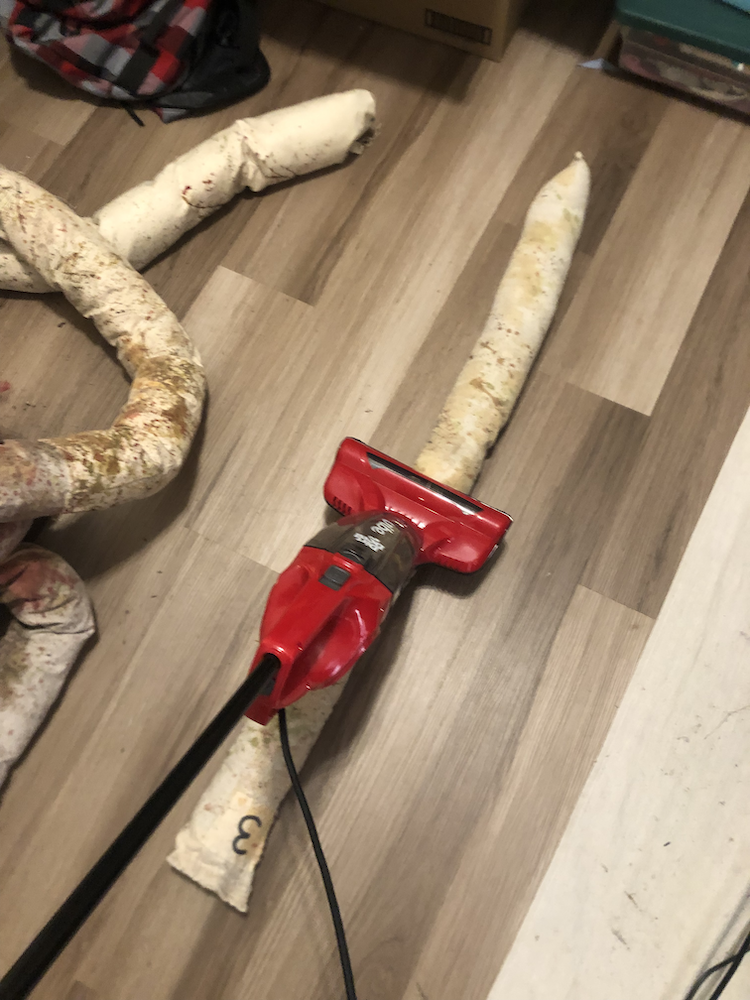
vacuuming my rats
The mud had bits of bark chips and plant debris, so they needed some cleaning after they dried off.
Puppet/Mask Pattern
I decided to digitize my pattern for these puppets, and now it can be yours!
I have not yet taught or documented the full process, so this tutorial is a work in progress at the moment.
Part 1: Pattern & Cutting
The second page of the pettern is a cutting guide to the main head piece. It is not to scale, as the whole thing is made from simple geometric shapes that are easy to simply measure. Depending on how your brain works, it may be easier for you to follow the image, or you can follow along here with me.
1: Draw a quarter of a circle with a 24-inch radius.
2: Starting at the point of the pie, draw a 45-degree line to mark the center of the slice. This is the bottom of the head, the seam is along the top.
3: Starting from where this line intersects with the curved edge of the circle, measure 10.5 inches to either side and mark. Next, from these marks, measure towards the point of the nose 4.5 inches and mark again. This is the outermost corner of the eyes. You can use my measurements for the eyes, or make your own! Cut out the eye-cutting guide on page 3 if you would like to have the exact shape.
4: Along the previoulsy marked bottom line, measure 2.5 inches from the curved edge. This is where the base of the mouth will start. Make another mark 6 inches from the tip of the nose, this is where the mouth will end. Draw a 6 inch line across the base of the mouth, and sketch out a triangular mouth shape that ends in a curved point.
5: Cut out the head shape, do not cut out the mouth or eyes yet!!! They will make shaping the cardboard difficult, so wait to cut them until a later step.
6: Cut out the ear pattern and make 2, mirror images.
7: Cut a 2-inch wide strip of cardboard, with the grain of the corrugation facing against the long side. Cut to lengths of 36" and 8". You may need to piece strips together for the longer one, that is totally ok.
8: Cut 2 rectangular pieces of cardboard 4 inches by 3 inches, to fit behind the eyes. If you used your own eye design, measure the eyes and add one inch to each side.
Part 2: Curving
It is time to curve the cardboard to prepare it for sculpting! On the edge of a hard surface such as a desk, run the smaller strips lengthwise (always along the same side), pulling down firmly to crease the underside of the material. The strips should naturally start to curve downward, and you'll notice how they easily bend with the grain of the corrugation.
Do the same with the head, this time working the creases in radial lines from the edge of the quarter to the point. Since you'll be working against the corrugation half the time, this will be more difficult than the strips and take more than one pass to soften and shape the cardboard. Eventually, it will also start to hold a curved shape.
Do the same to the ears, remeber they're mirrored copies! Crease along the line that seperates the tabs from the ear, and bend the tabs backwards away from the center of the ear.
Part 3: Construction
Now you may cut out the eyes and mouth, take care not to cut the base of the mouth. This is the hinge!
Curve the head fully into a cone, overlapping the seams by 1.5 - 2 inches. Attach with hot glue or a really strong stapler. Take the 36-inch strip and attach it around the edge of the back of the head, this is for extra stability.
Open the mouth, and attach the 8-inch strip across the hole. This is also for extra stability.
Curve the ears, overlapping the "top" side with the "bottom" by about an inch, and secure. Keep the tabs pointed outward and position on the head. Use the tabs to staple or glue the ears in place.
The handles I used are larger strips of cardboard, rolled into logs to be stiffer and hot-glued across the back of the head. I'm not positive this is the strongest or most efficient method yet, and encourage you to experiement a little before making them the same way I did! Alternatively, if you're making a mask, you don't need a handle and instead experiment with adding elastic.
Part 4: Paint
Time to paint! Yes, we haven't touched the rectangles of cardboard for the eyes yet, this was on purpose! Paint the heads and the eyes seperately before glueing them in place, this prevents you from having to do complicated taping or careful line work.
Part 5: Hoods
The hoods on my rat puppets are 42 x 18 inch rectangles of fabric. You can do pretty much anything with it!
If you want to use a similar scrap-fur design, go right ahead! I make the "fur" by cutting scrap fabric into 3-4 inch strips, then cutting slits along one edge to give it a pinata paper style. It's going to take so much more than you expect. Starting at the bottom of the hood, sew a line of scraps so they hang off the edge. When you run to the end of a strip, just grab another one and keep going. Once you have one line, go back to the beggining and start another line about 1 inch higher so that the two overlap. Don't worry if you can see your first line of stitching, it will all blend together from afar. COntinue sewing lines until you have covered the whole rectangle, leaving the last inch free for attaching to the mask.
I like to use a wide varriation of fabrics and a small varriation of color (for example here, blue, black, and grey) for a scrappy but still cohesive design. I'm not going to tell you what to do creatively though, go crazy.
Part 6: Other Stuff
Fur: Using the same scraps from the hoods, I started with circling each ear to hide the construction tabs. Then it was just a matter of layering and glueing each line of scraps into a triangle down the center of the head.
Mouths: I used large pieces of fabric to cover the insides of the mouths and hide the puppeteer. Working from the outside, I cut a vague shape larger than I needed and tucked the fabric up into the mask to glue in place. Painting some light "gums" around the edges and black in the middle really sells this simple design.
Whiskers: These whiskers are made of two pieces of yarn braided with a small strand of wire. There are many other less time-consuming ways to make or buy whisker-like materials.